Conditional Formatting, also known as Color Formatting, is used to highlight specific values by applying different color schemes when those values meet predefined conditions. This helps relevant data stand out from the rest.
The color formatting could be applied to the text value or its background.
The Conditional Formatting option supports a few data types including:
Number
Dropdown
Mirror Number
Mirror Dropdown
All other data types are not supported by this feature.
The State data type has color formatting support embedded by default.
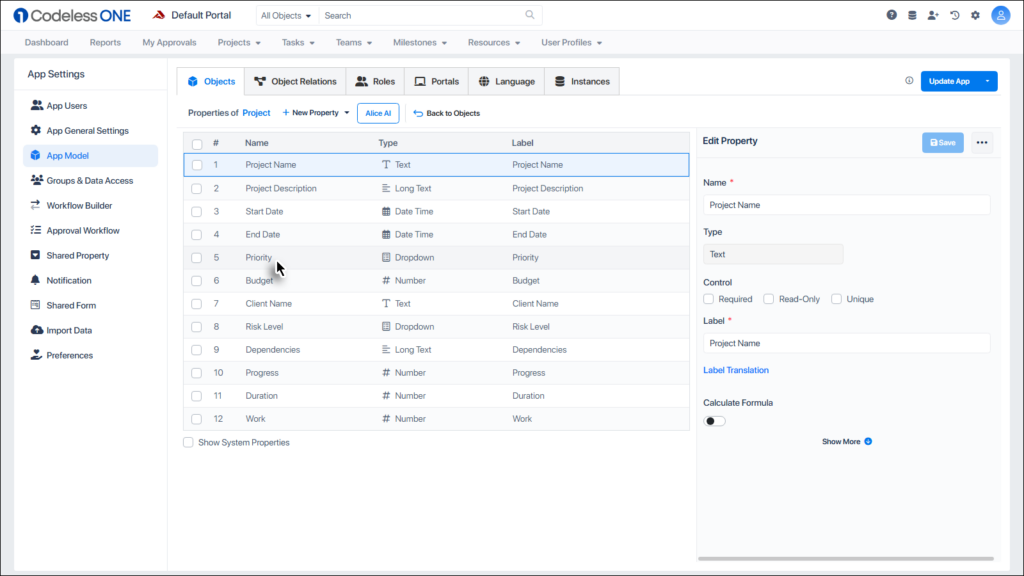
Click on App Settings icon and then select the Application Settings option.
Click the App Model option in the panel.
Select the desired object.
Select the relevant property.
Click Show More option at the bottom of the panel.
Click the + Add color formatting button.
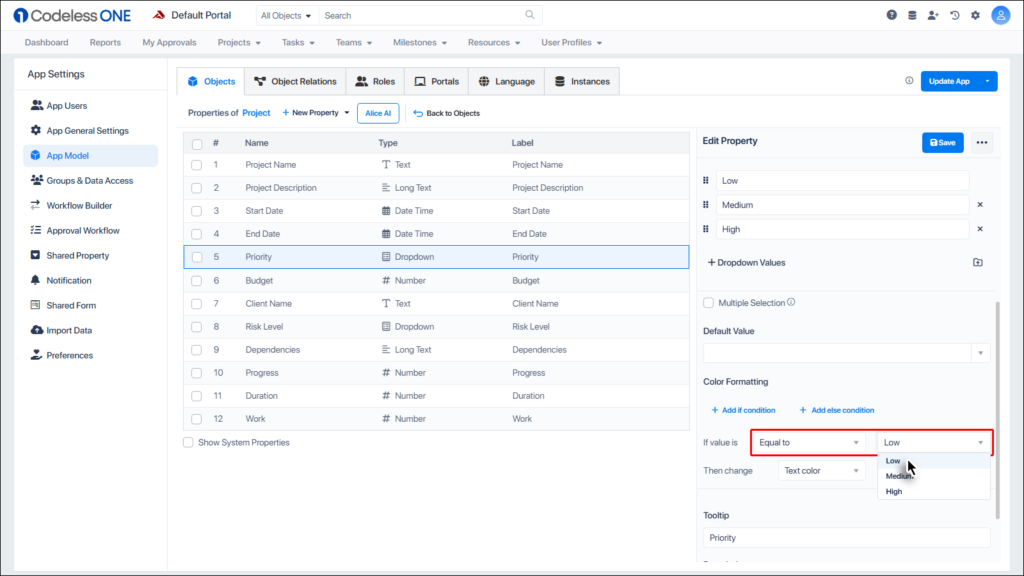
The Conditional/Color formatting section is displayed.
Used to add an if (or else if) condition
Used to add an else condition
Used to pick the relevant operator for the condition
Used to set the value that would trigger the condition
Used to select where to apply the color formatting, on text or at the background
Color picker used to select the color. The selected color would be applied in case the condition becomes true
Used to delete the condition
Now, set the if part of the condition.
Set the then part of the condition (where color coding is done).
The first value of the dropdown control has been configured. We have configured that for Priority value “Low”, the value cell would be filled with blue color.
To configure the next dropdown value, we need to add another if part. Click the + Add if condition button.
Repeat the above process until all the desired values have been configured. Now click the Save button.
The number or text type properties can also be color-formatted similarly.
Click the Update App button.
Click the Confirm button to complete the process.
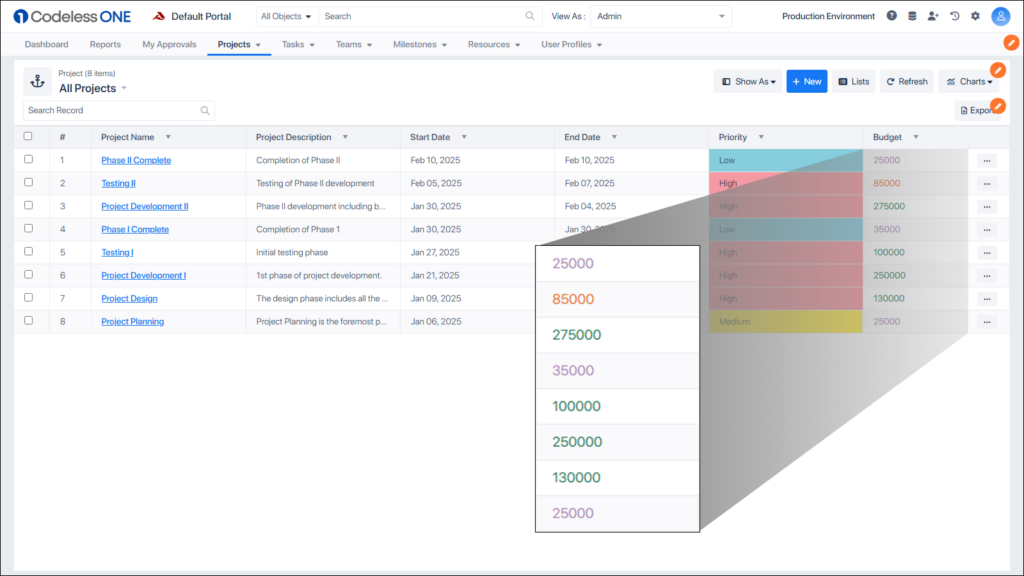
Now open the relevant object in Table view.
The relevant property values has been color formatted as per the conditions that we set.
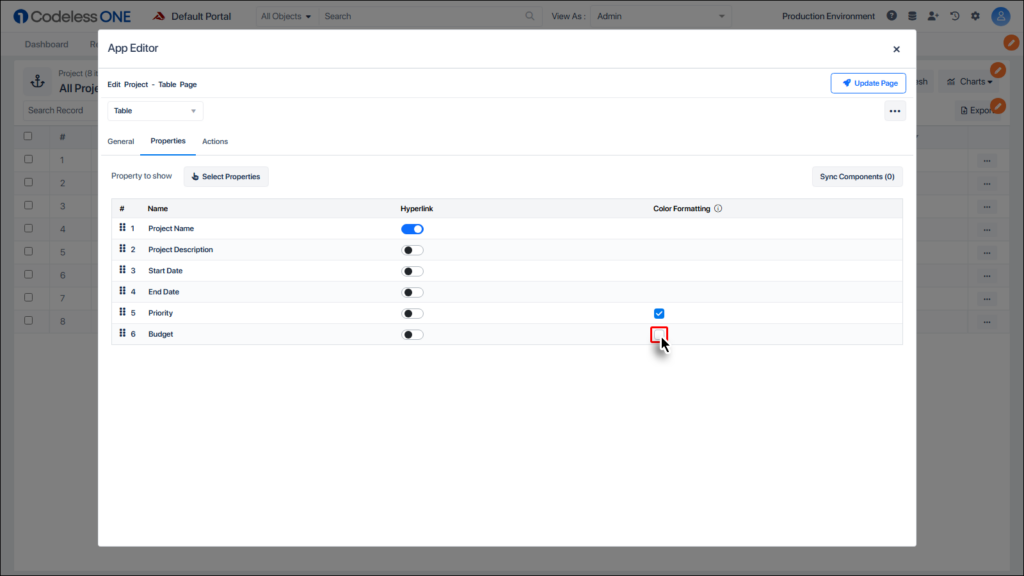
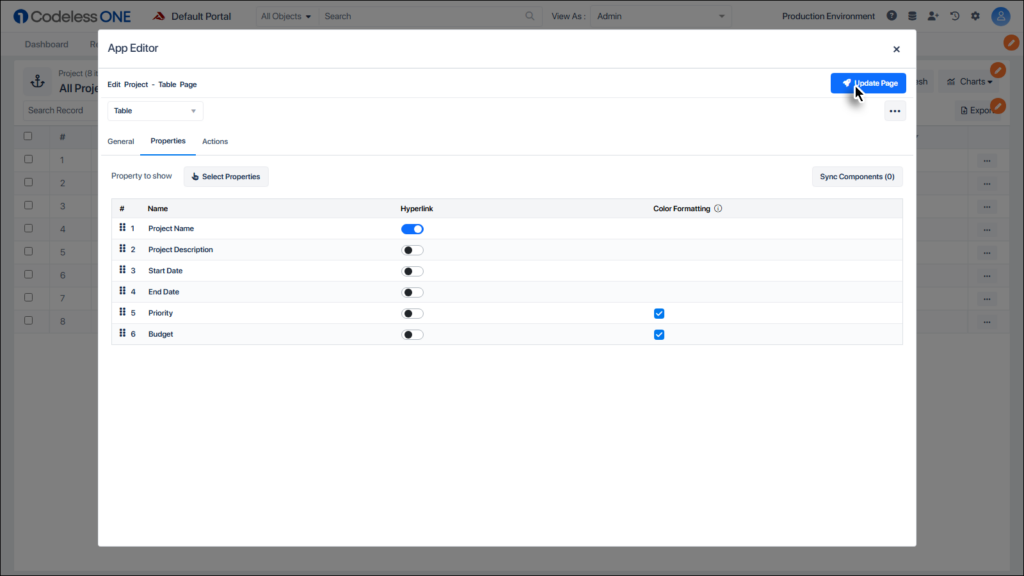
I applied color formatting to one of the fields in a table, but nothing happened. Why?
Sometimes users may apply color formatting to a field, but it does not show up on the table.
This is due to the color formatting not enabled for that particular field. To correct this problem, follow these steps:
Click the App Settings icon and then the On button.
Click the table edit orange icon (the bottom one).
Click the Properties tab.
We can see that the checkbox corresponding to our property in question is not enabled yet. Enable this checkbox.
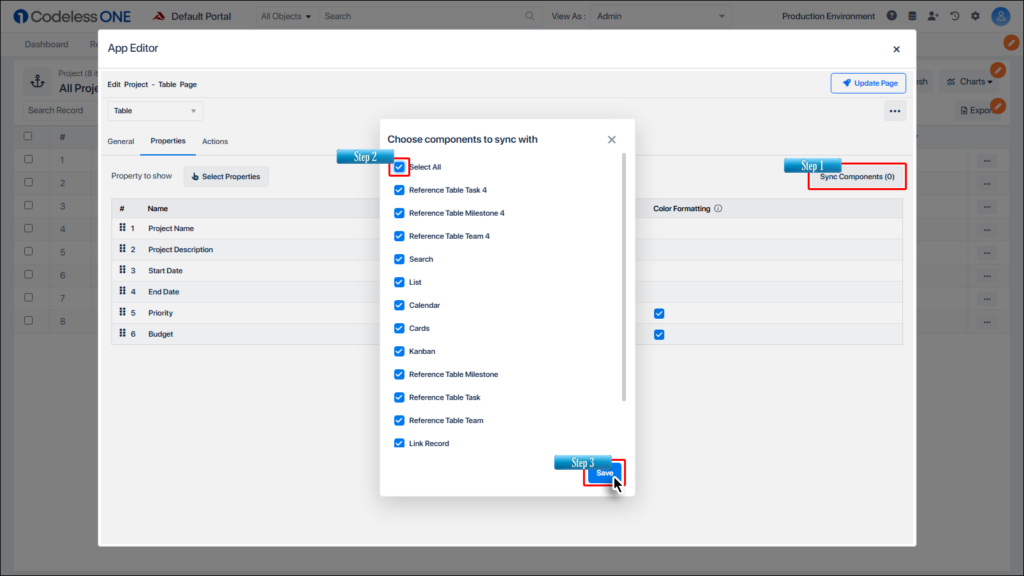
The color formatting can also be applied to other views, apart from the Table view. To do it click the Sync Component button, select the desired views (or Select All) and then click the Save button.
Click the Update Page button.
The color formatting has been applied to the relevant field.