Implementing a Tree Dropdown Property Type in Your Application
In today’s complex data environments, structuring information in a clear and accessible manner is crucial.
One effective way to achieve this within your applications is by utilizing a Tree Dropdown property type. This hierarchical structure allows for the organization of data into nested categories, making it easier for users to navigate through options and make selections.
Here’s a step-by-step guide on how to add a Tree Dropdown property type to your application, using a product category as an example.
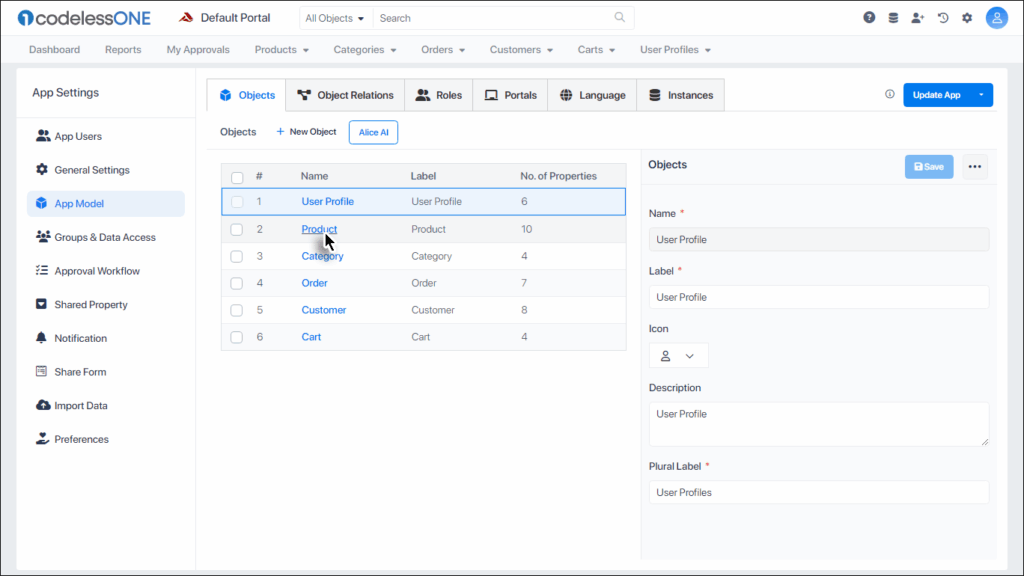
Begin by choosing the object to which you want to add the Tree Dropdown property. This could be a product, category, or any other item that benefits from hierarchical organization.
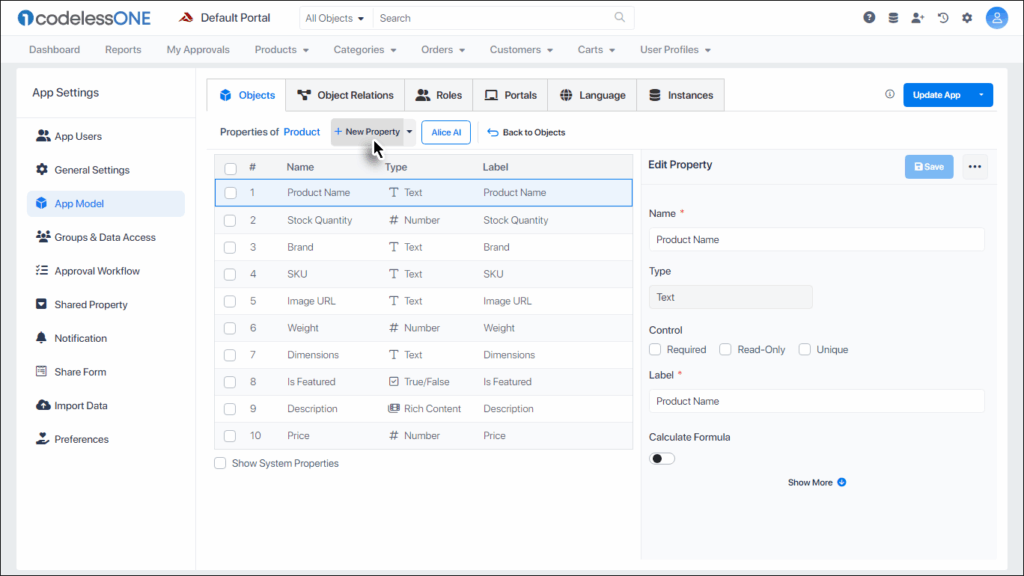
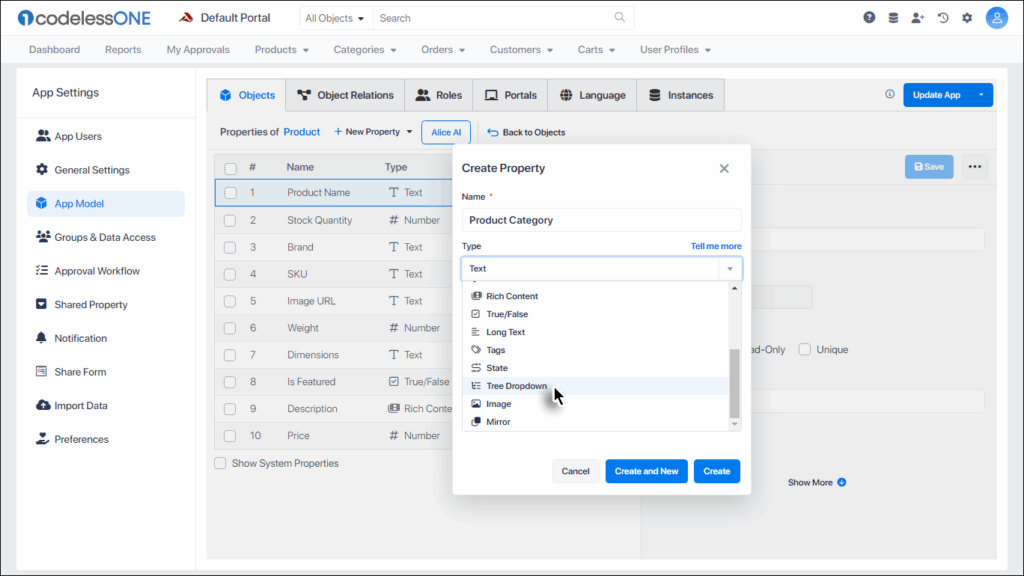
Initiate Property Addition
Click on the “+ New Property” button to start the process of adding a new property to your selected object.
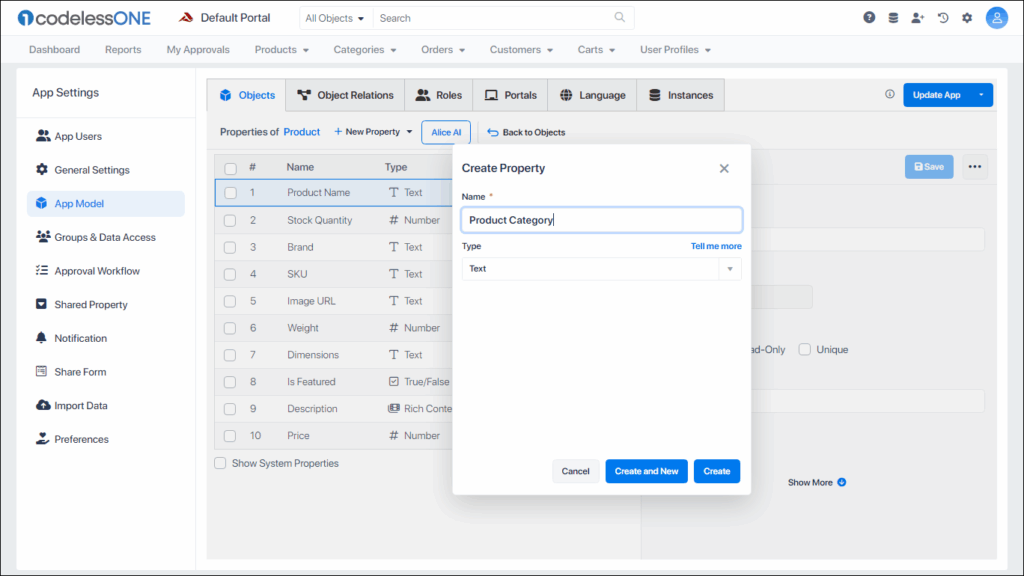
Fill the Form
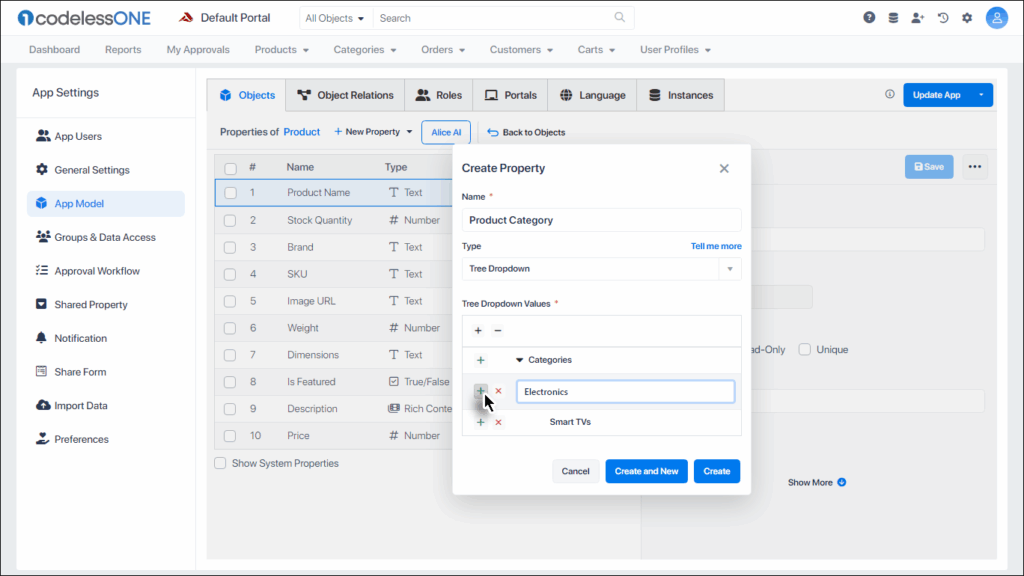
Enter the name for your new property in the provided form. For demonstration purposes, we’ll name our property “Product Category.”
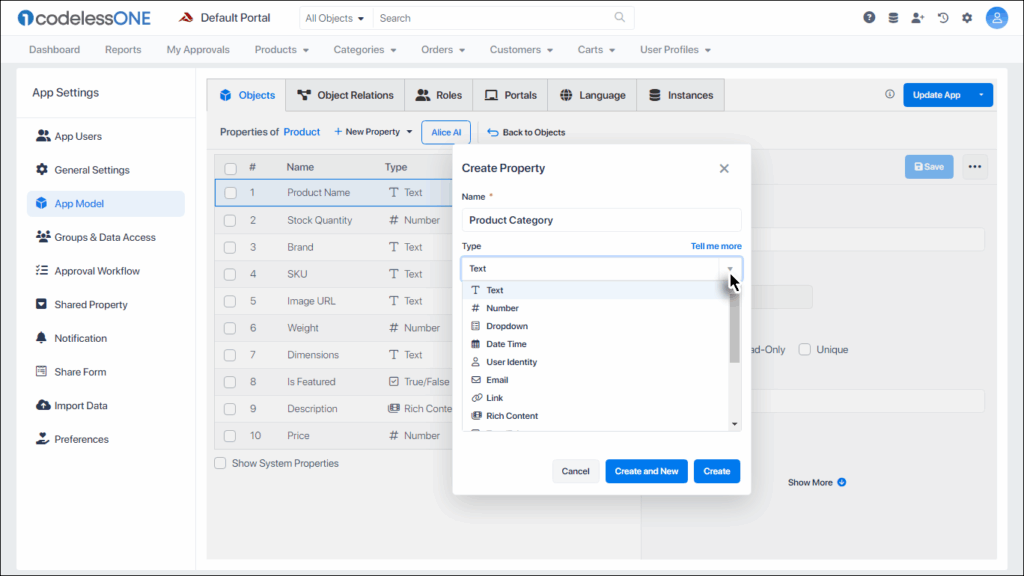
Select the Property Type
Click on the dropdown arrow beside the property type field to expand the list of available property types.
From the dropdown list, select “Tree Dropdown” as the property type.
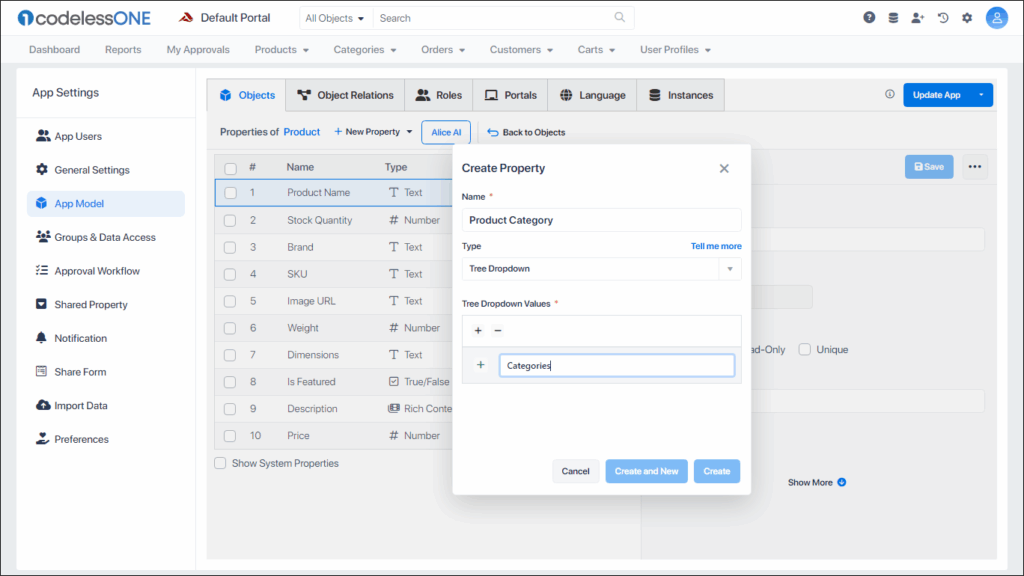
Adding Tree Dropdown Values
Upon selecting the Tree Dropdown option, a text field will appear for entering the values of your tree structure.
Start by entering “Categories” as the parent category.
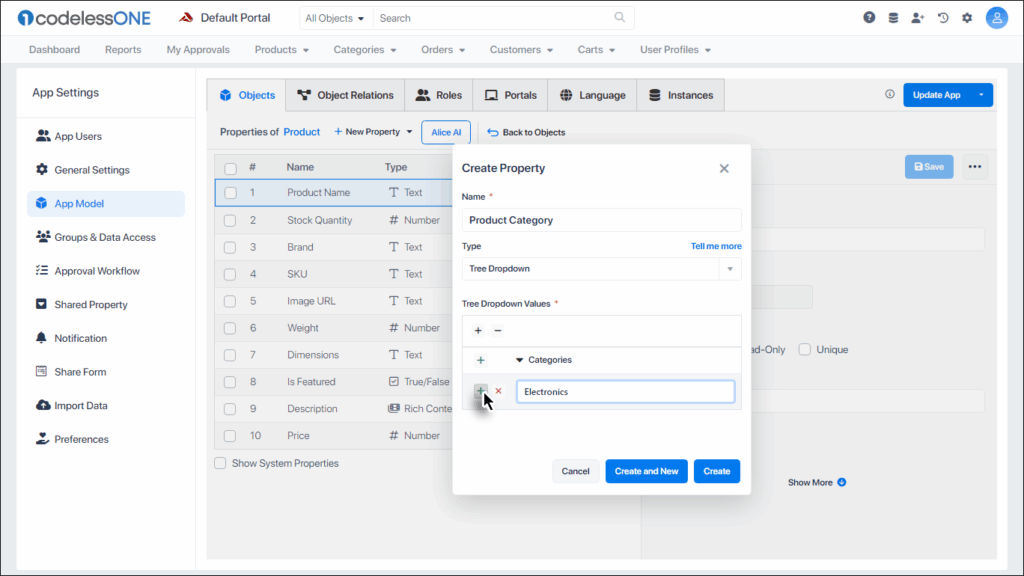
To add a sub-category, click on the “+” button next to “Categories”
Then enter the first child category, for example “Electronics.”
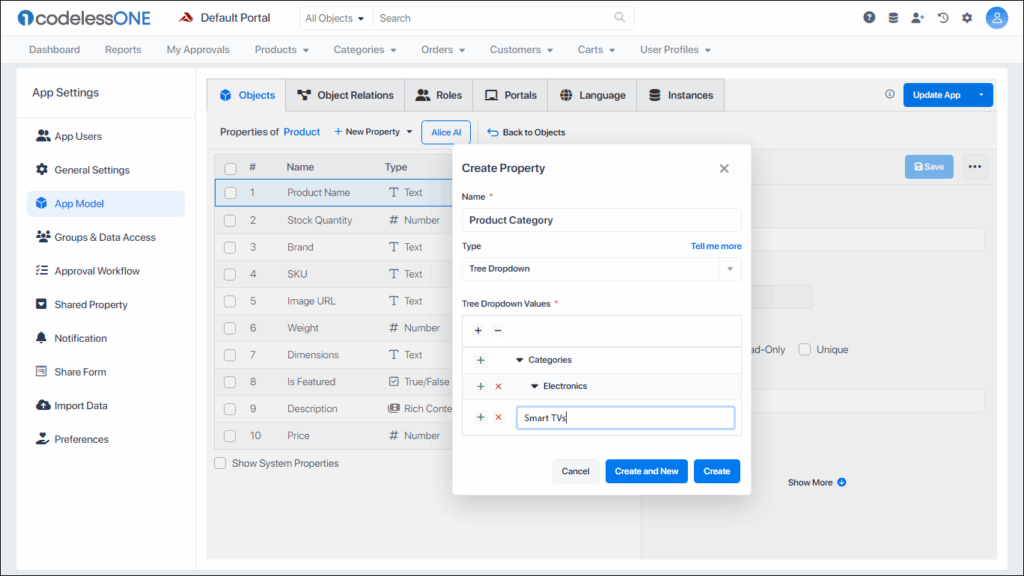
To further nest categories under “Electronics,” click on the “+” button next to “Electronics”
Now add a child category and let’s call it “Smart TVs.”
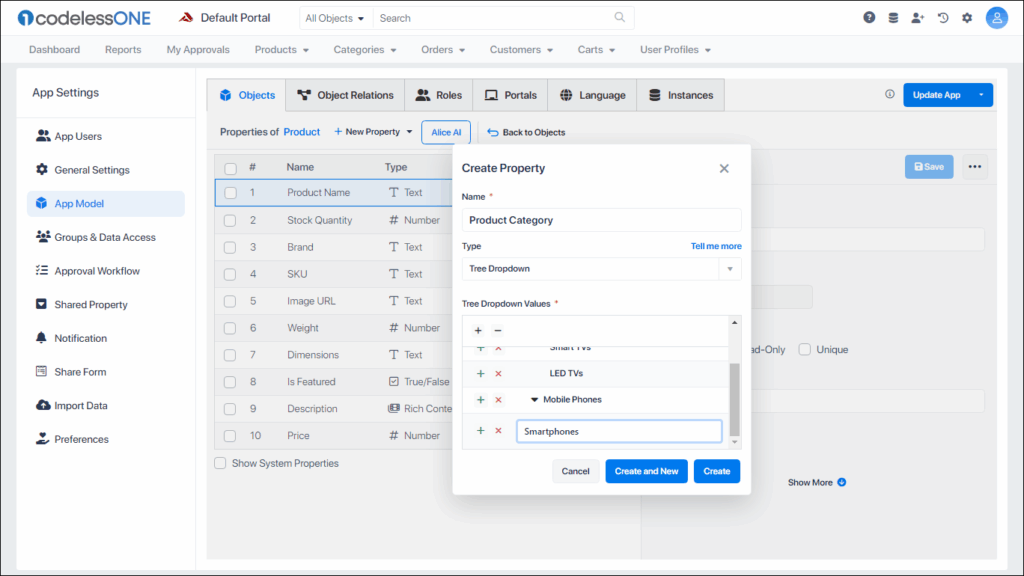
Continue this process to add more sub-categories under “Electronics” by clicking the “+” button next to “Electronics” again.
Name the new sub-category as “LED TVs”.
Adding More Categories
To introduce another main category alongside “Electronics,” click on the “+” button next to “Categories” again.
Add a new category, for instance, “Mobile Phones”.
To add sub-categories to “Mobile Phones,” click the “+” button next to “Mobile Phones” and enter “Smartphones” as a child category.
Finalize Your Tree Structure
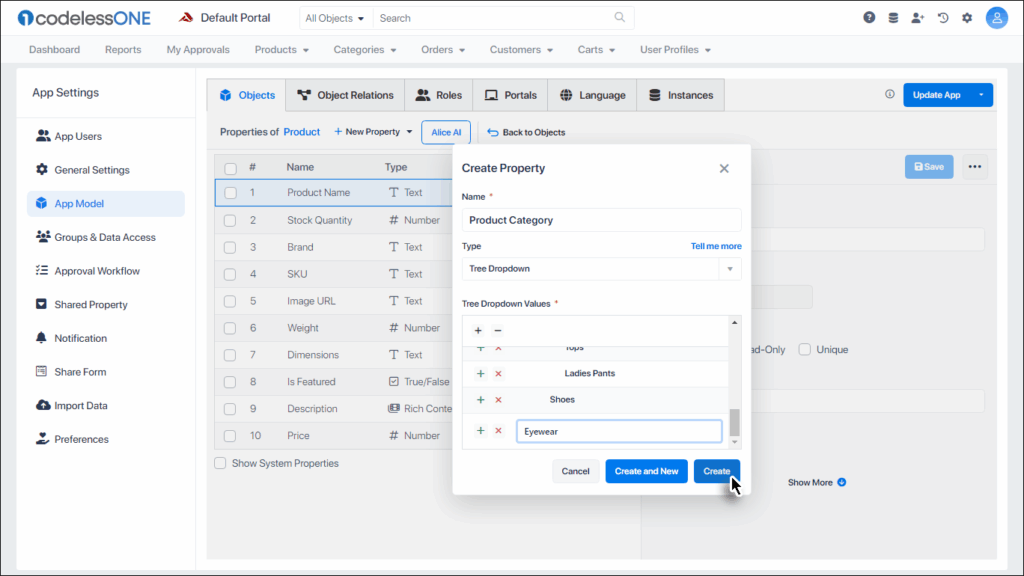
Continue this process until you have added all desired categories, sub-categories, and even sub-sub-categories to your “Product Category” property.
Once you have structured your categories as needed, click the “Create” button to finalize the Tree Dropdown property.
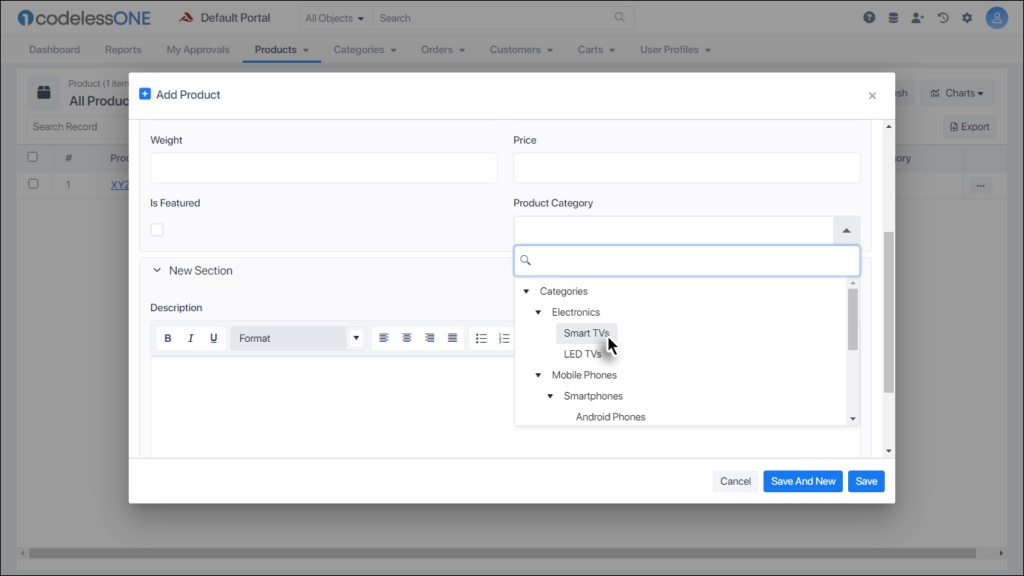
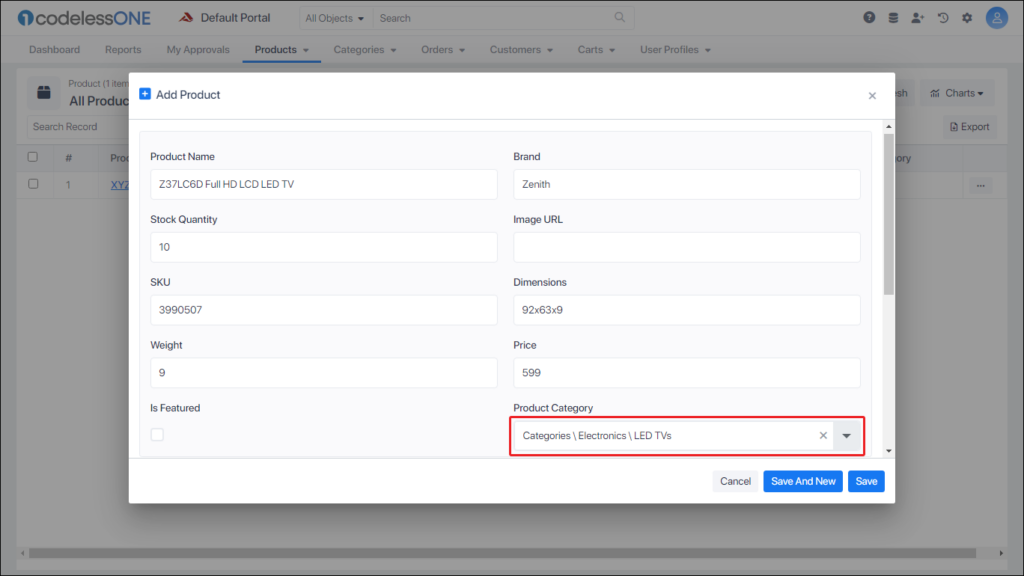
When adding or editing a record in your application that involves the “Product Category,” users will now see a hierarchical dropdown menu.
This Tree Dropdown enables users to select from your predefined categories and sub-categories, offering a streamlined and intuitive selection process.
Creating a Tree Dropdown property type in your application is a straightforward yet impactful way to enhance data organization and user experience.
By following the steps outlined above, you can efficiently structure complex data into an easily navigable format, improving both the usability and functionality of your app.
Whether for product categories, organizational hierarchies, or any other nested data structure, a Tree Dropdown is an invaluable tool in modern application design.