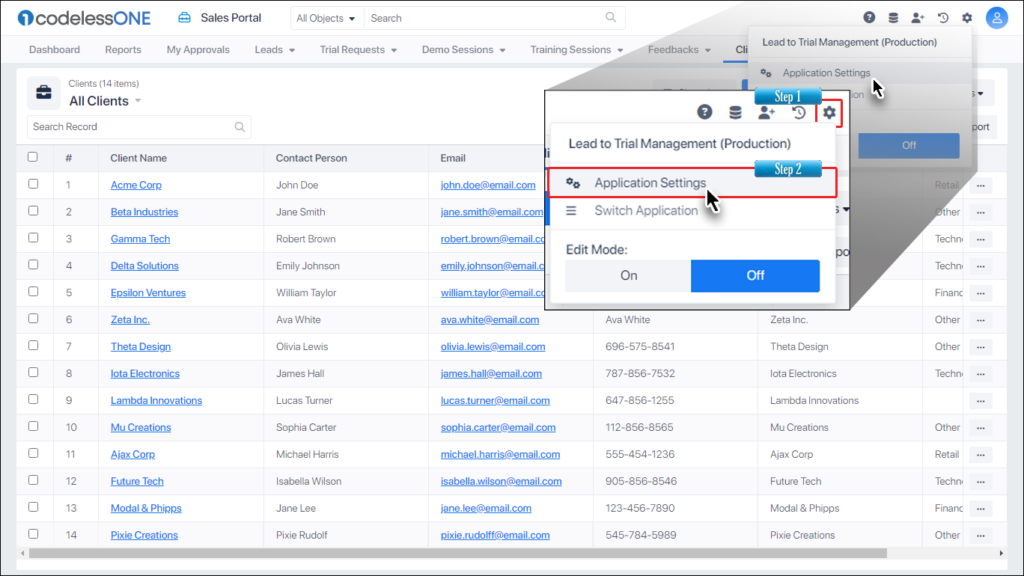
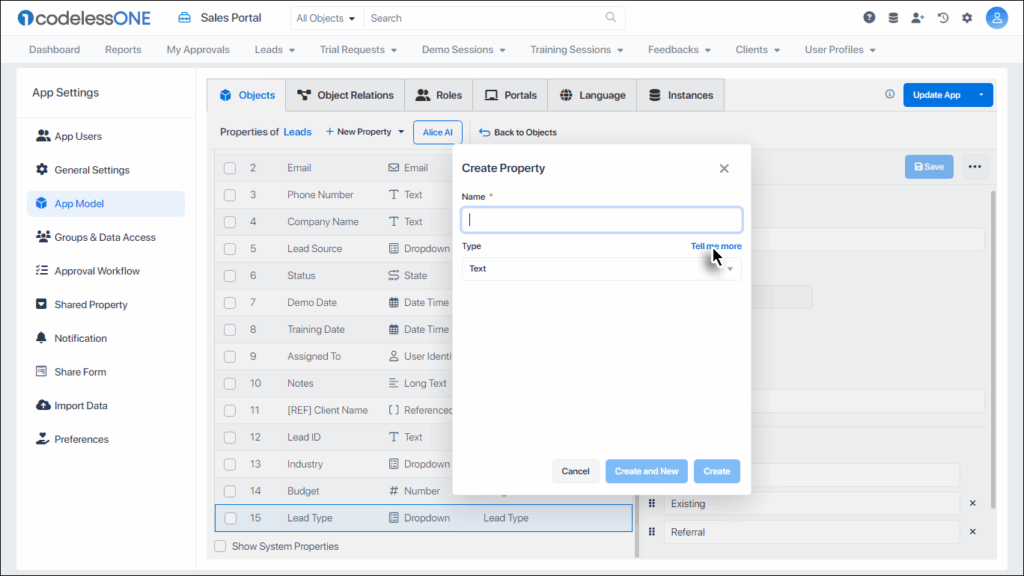
Skip to content

Enhancing Your App: Incorporating New Properties

Enhancing Your App: Incorporating New Properties

Incorporating properties into application objects is a vital step in tailoring and enhancing your app’s functionality.
While this article uses a CRM application as an example, the described methodology applies universally across all types of applications.
The App Model is the backbone of your application, shaping its structure/schema. Whether you’re building your application from scratch, utilizing Alice AI, or starting with a pre-existing template, the App Model is where you define and refine your app’s architecture.

Accessing and Modifying the App Model

To add new properties to an object in your application:
Go to Application Settings: Click on the settings button and select ‘Application Settings‘.
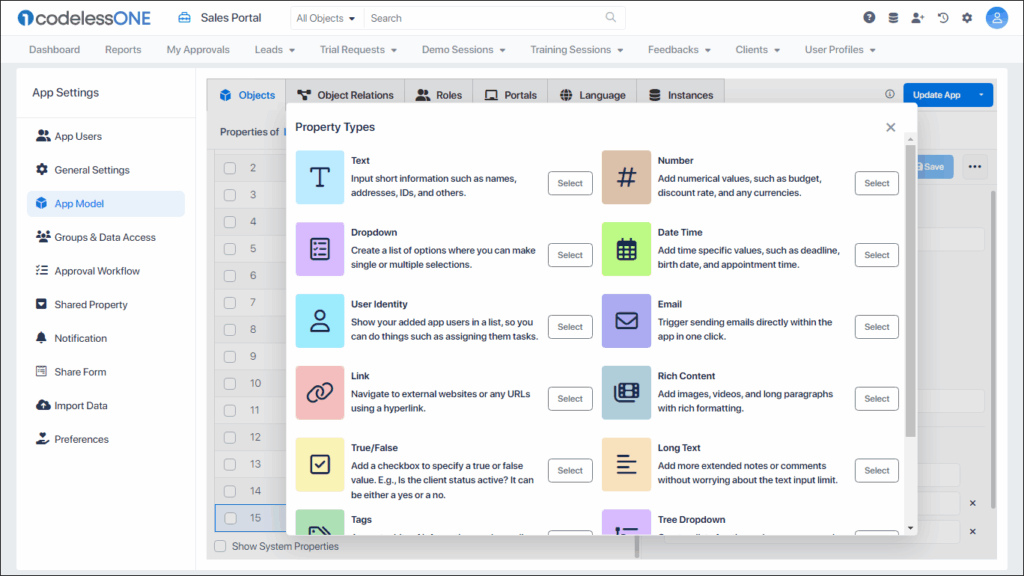
Find the App Model: In the settings, you’ll see various components, including the ‘App Model’.
Clicking on it reveals your app’s structure, including objects, properties, relationships, roles, and portals.
Methods for Adding Properties

Method 1: Using Alice AI

Select Your Object

Choose the object to which you want to add properties.

Select Alice AI

Click on the Alice AI button for AI-driven recommendations of properties related to your selected object.

Incorporate Properties

Choose the suggested properties you find suitable and click ‘Add‘ for a seamless AI-assisted addition.

Method 2: Manual Addition

Initiate Property Addition

Click the “+ New Property” button

Fill the Form

Enter the property name, select its type from the dropdown, and click ‘Create‘.

Understanding Property Types

If you need clarity on property types, select ‘Tell Me More‘ to view detailed descriptions and use cases.
Choose from Text, Number, Dropdown, and other types.
Direct Selection and Creation: Directly pick a property type from this page
click ‘Create‘ to add it to your object.
Note: Use ‘Create and New‘ for adding multiple properties in a single instance.

Ensuring Changes Reflect in Your Workspace

After adding properties:
Step 1: Update the App
Locate the Update Button: On the App Model page, find the ‘Update App‘ button in the top right corner.
Step 2: Integrate Changes
Apply Updates: Click on the ‘Update App’ button. This action integrates your newly added properties into the workspace, ensuring that the changes made in the App Model are accurately reflected in your actual workspace.
By thoughtfully adding and configuring properties for your objects, you customize your application to effectively meet specific operational needs. This process is critical in ensuring efficient and precise data management.
Whether you are working on a CRM system or any other application, mastering the addition and management of properties is key to creating a functional and dynamic tool.