Skip to content

How to Manage Subscriptions?

How to Manage Subscriptions

Codeless ONE is a powerful platform offering various features and tools to help teams collaborate effectively. However, to access the Workspace, users must be assigned a subscription.
This article will guide you through assigning subscriptions to your Workspace users step-by-step.
To assign subscriptions to users in your Workspace, you must first navigate to the Workspace Users Tab. This can be achieved by clicking the “Settings” button on the homepage of your Workspace.

Step 2: View the List of Users

By navigating to the Workspace Users Tab, you can access the complete list of all the users invited to access your Workspace. However, only users who have been assigned a subscription will be granted access.
Note: For example, if your plan permits you to assign subscriptions to 5 users, the first five users who have been invited to join your Workspace will be automatically granted a subscription. Any additional invited users will not be assigned a subscription.

Step 3: Assign Subscriptions

To assign subscriptions to users needing access to your Workspace, click the + button under the “Actions” column.
Clicking the + button automatically assigns the license to the selected user, granting them access to your Workspace.
The number of subscriptions you can assign to users is determined by the plan you are subscribed to.
At the top of the page, you can easily view the number of available seats/subscriptions that can be assigned.For example, if a user has subscribed to a plan that provides five seats, they can assign subscriptions to up to five users to access their Workspace.
In the example provided below, three users have already been assigned a subscription out of the five available seats.
If you attempt to assign licenses to more users than your plan allows, the system will prompt you to upgrade your plan to allocate additional licenses.

Remove Subscriptions

To remove a license from a user assigned a subscription, select the “-” button in the “Actions” column.
Upon clicking the “-” button, the system displays a warning message requesting you to confirm the action.
To proceed with the removal, click on the “remove” button. Alternatively, click the cancel button to abort the removal process.

Manage Users

The ability to assign and reassign licenses provides an efficient means of managing the users with access to your Workspace. This is especially useful in situations where users leave the organization or when new users require access. By being able to manage subscriptions, administrators can ensure that only the appropriate users have access to the Workspace, thus optimizing security measures.
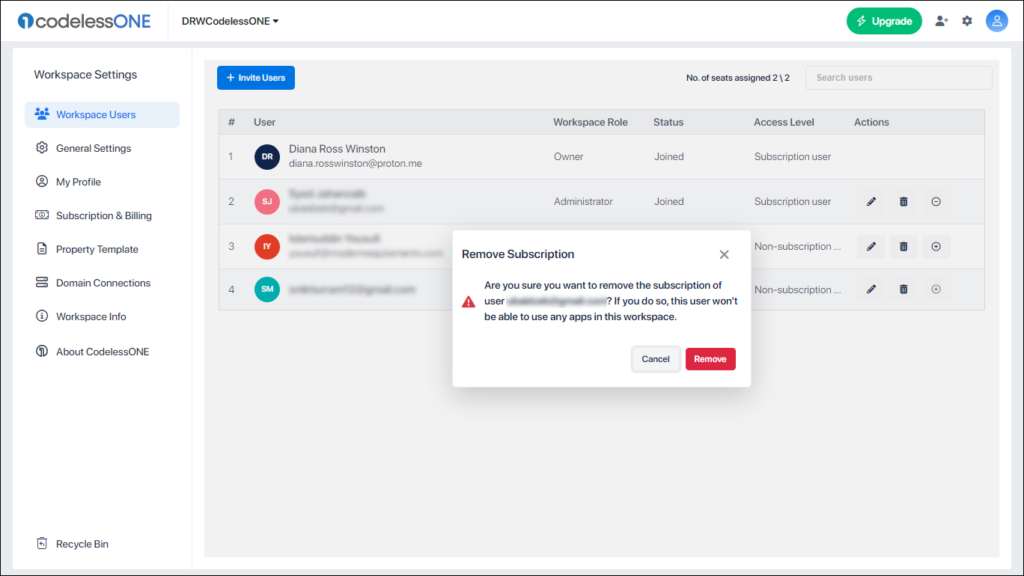
Furthermore, this capability allows for an enhanced user experience, streamlining the process of granting and revoking access. Ultimately, effectively managing users through allocating and reallocating licenses facilitates seamless collaboration within teams and enhances productivity.
By following the steps outlined in this article, you can easily manage the users who have access to your Workspace. Ensuring that the right users have access to the Workspace is essential, as this can help streamline workflows and improve collaboration within your team.