How to Change the Name and Owner of Your Workspace
Managing your Workspace is an important part of maintaining your applications, and this includes changing the name and owner of your Workspace as needed.
If you’re looking to make these updates, you can follow these steps:
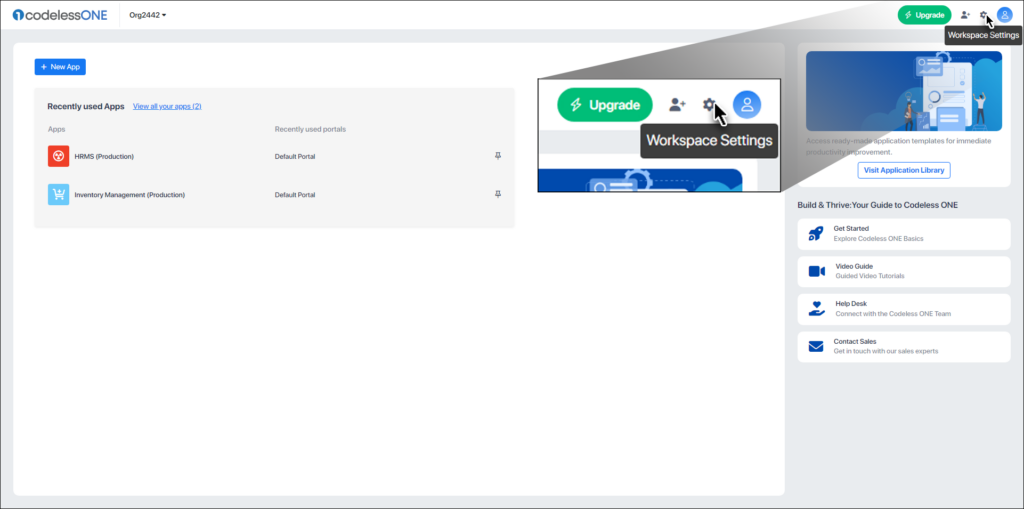
To get started, click the workspace settings button from your homepage to access the Workspace settings page.
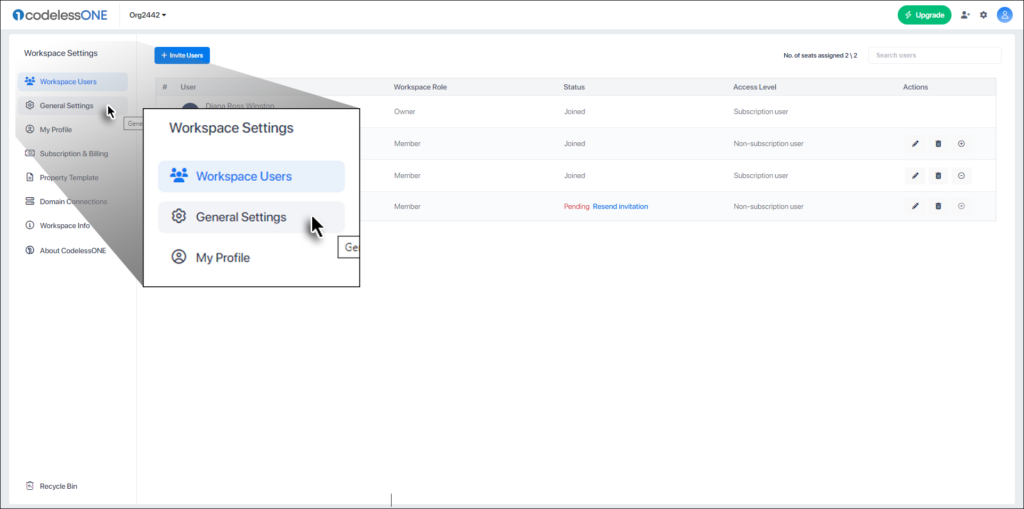
From there, navigate to the General Settings tab to access the general settings page.
Update Workspace Name
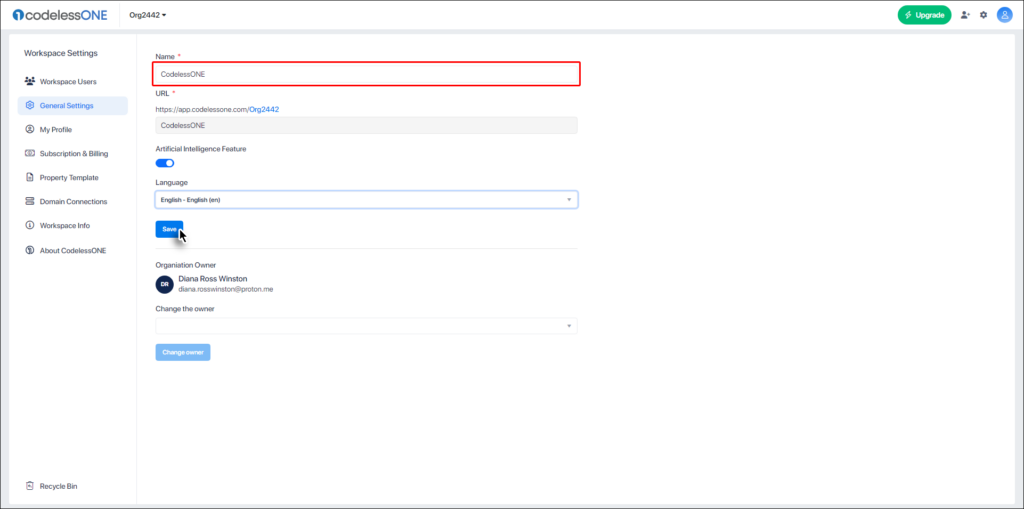
Once on the general settings page, you can view your Workspace name, URL, and the Workspace Owner.
To change the Workspace name, update the text in the Name field and click Save.
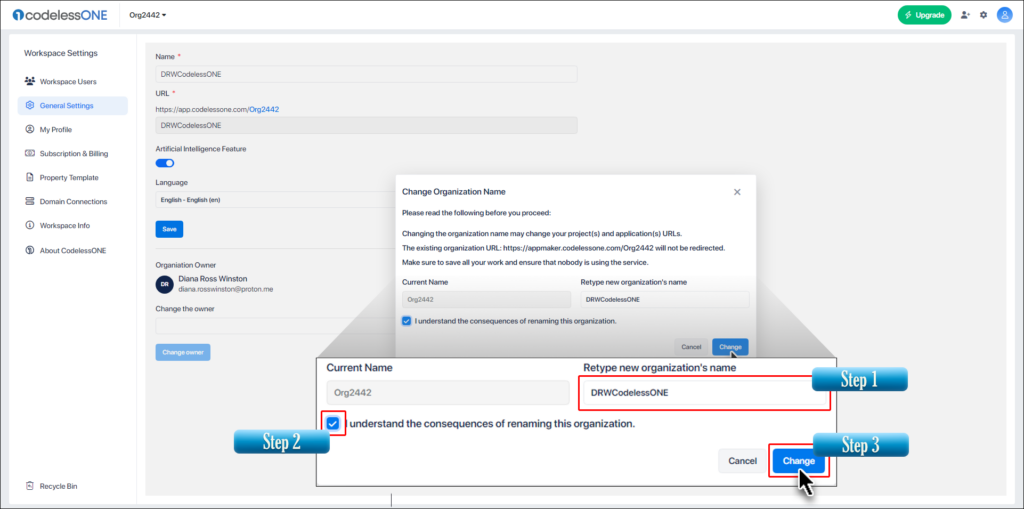
A confirmation dialogue box will appear. Retype the new name of the workspace, select the checkbox and then click the Change button.
The system will automatically update your Workspace name and URL.
Note:Users to whom you have assigned administrator rights can also change the name of your Workspace.
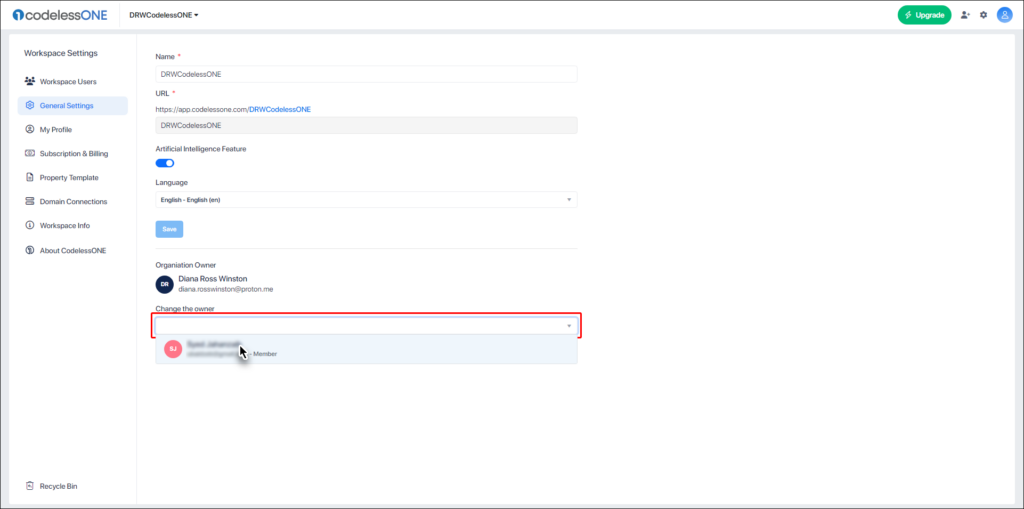
Change Workspace Owner
If you want to change the owner of your Workspace, click the dropdown button in the Change the Owner field. The system will display all the users who have joined your Workspace and been assigned a subscription.
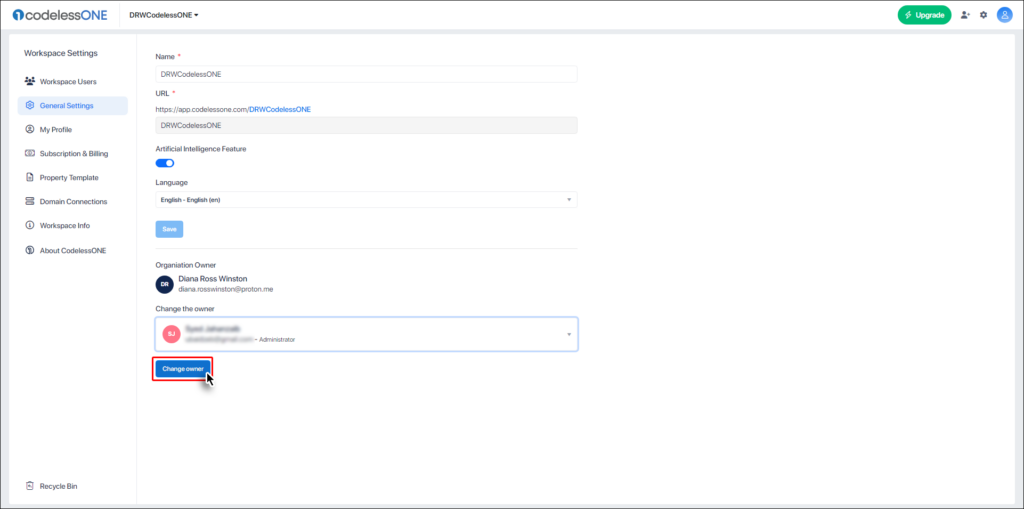
Next, choose the user you want to make the workspace owner and click the Change Owner button to apply the changes.
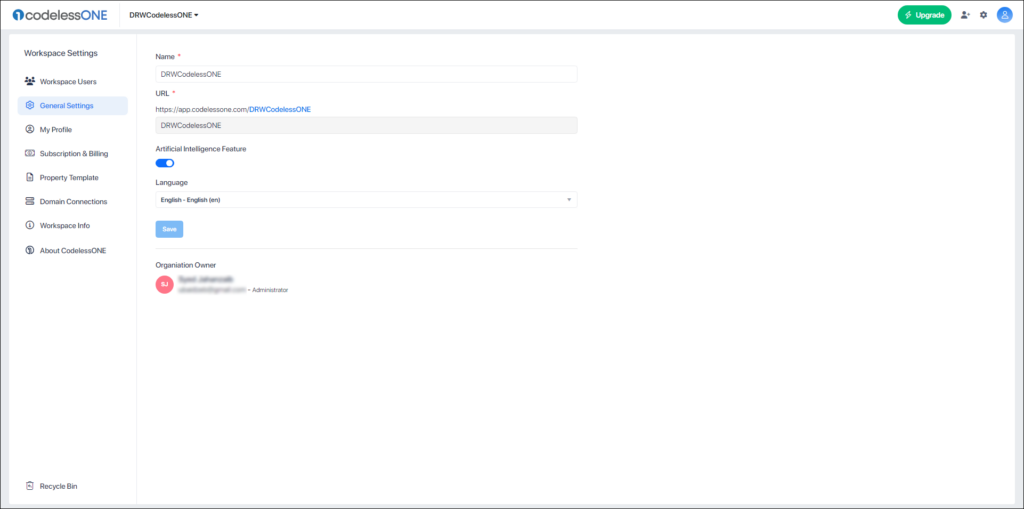
The system will automatically make the selected user the owner of the Workspace.
It’s essential to keep your Workspace up-to-date and reflect any changes in ownership or name.
By following these simple steps, you can ensure that your Workspace and applications are accurately represented.