Skip to content

How to update user access levels?

How to update user access levels?

When inviting users to join your Workspace, access levels are assigned based on the role and permissions needed. However, if the access level of a user needs to be updated after they have been invited, it can easily be achieved through the following steps:
To update the access level of a user, navigate to the Workspace Users Tab. This can be done by selecting the “Settings” button on the homepage of your Workspace.

Locate the User to Update

In the Workspace Users Tab, locate the user whose access level you want to update.

Edit User Details

In the Actions column for the selected user, you will see three buttons: Edit, Delete, and Assign or Remove Subscription. Click on the Edit button to begin updating the user’s access level.

Access the Update User Form

After selecting the Edit icon, you will be directed to the Update User form. This form enables you to make changes to the user’s access level.

Update the User's Access Level

Select the Workspace role field dropdown button to modify the user’s access level. This action will give you three options: Member, Administrator, and App Participant.
Choose the desired access level to update the user’s profile and click the Update button to confirm the changes.

Confirm the Update

Once the update has been confirmed, the system will automatically adjust the user’s access level. For instance, if the user’s previous role was “Member” and you updated it to “App Participant,” the updated role will be visible in the Workspace role column for that user.
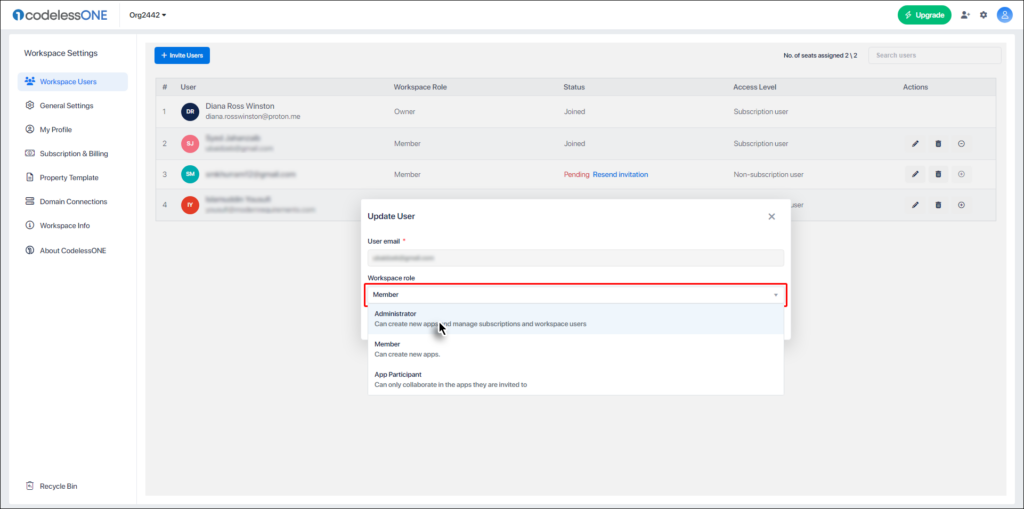
By following the above steps, you can effectively manage the access levels of your Workspace users, thus ensuring seamless collaboration within your team. Assigning the correct access level is essential for optimizing security measures and enhancing the user experience. With proper access levels assigned, users can navigate the Workspace more efficiently, only accessing the features and tools that are relevant to their work.