Inviting users to your workspace is only the first step in enabling them to contribute effectively. Providing access to specific applications within your workspace requires a few more actions but is crucial for assigning appropriate access levels to different users or teams.
Example Scenario: For instance, if your workspace includes applications for project management and marketing campaigns, you’d want to ensure that each team accesses only the applications relevant to their work. This approach not only maintains focus but also upholds data security and privacy.
Step-by-Step Guide to Inviting Users to an Application
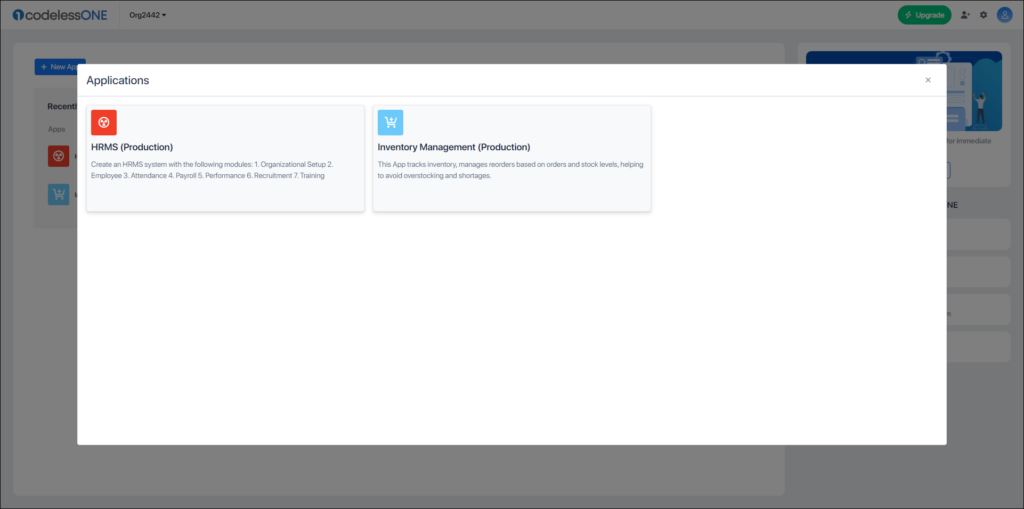
Identify and select the application you wish to add users to. This can be done directly from your workspace
Method 1: Through App Users Tab
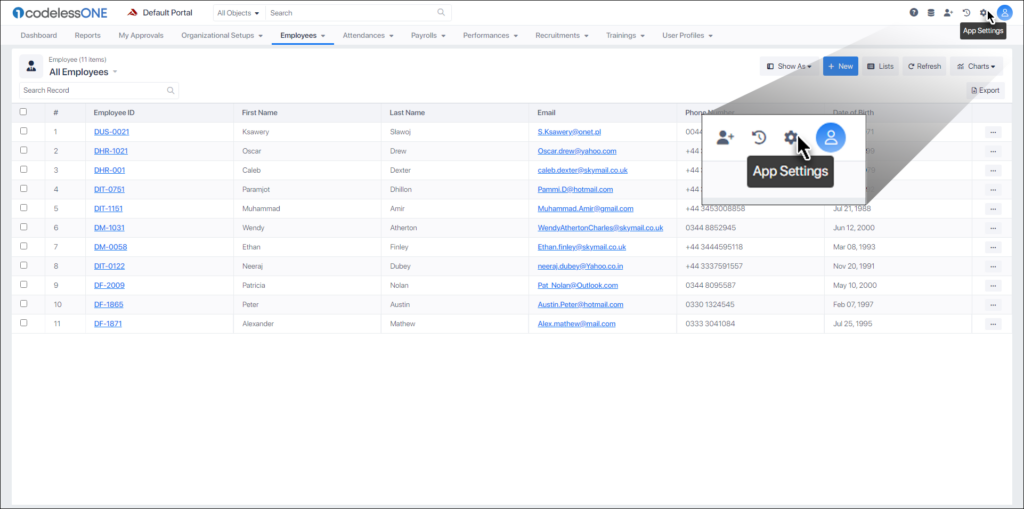
Access Application Settings
Click the App Settings icon in the top banner of your application dashboard.
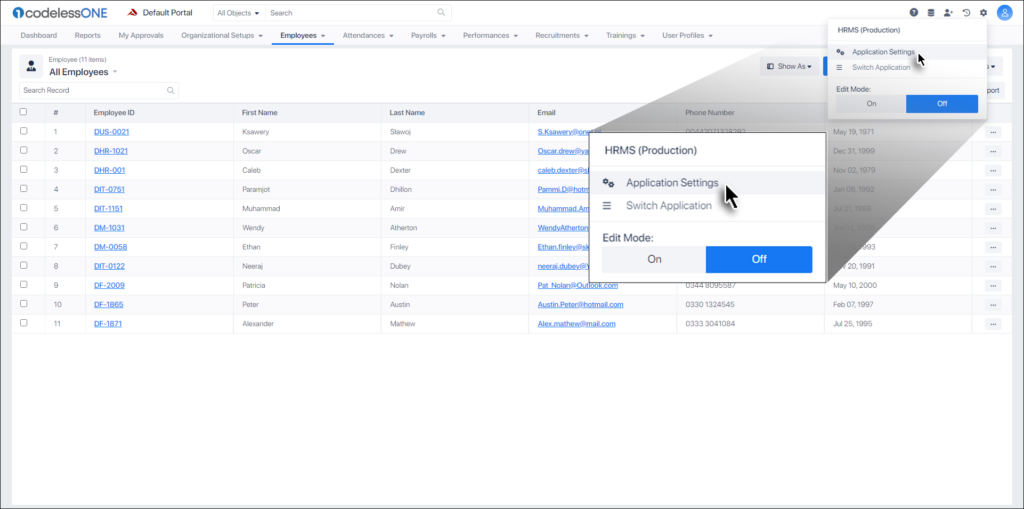
Click the Application Settings option.
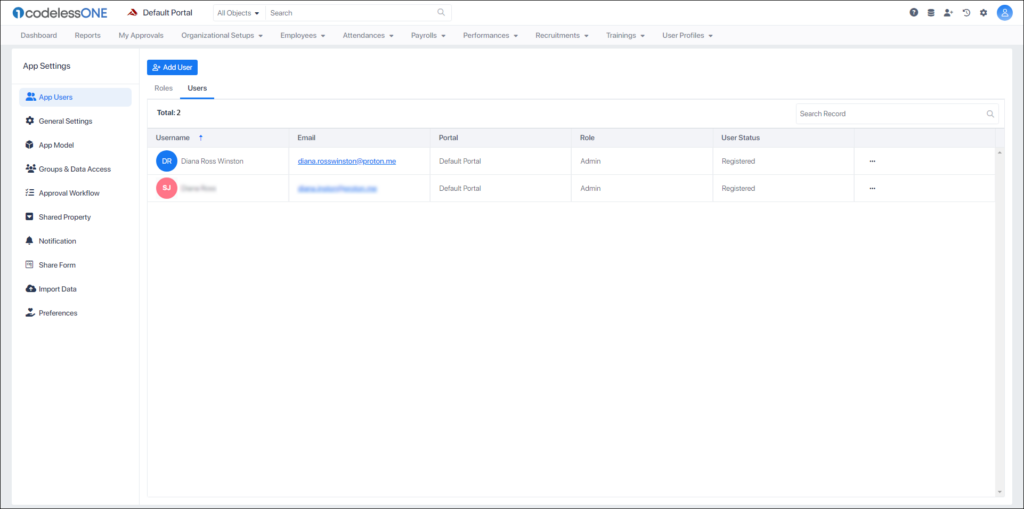
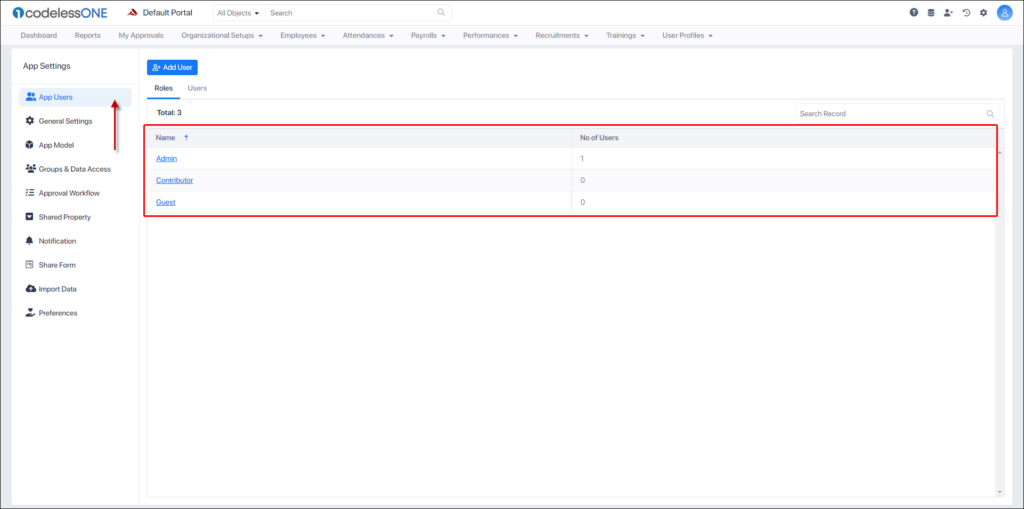
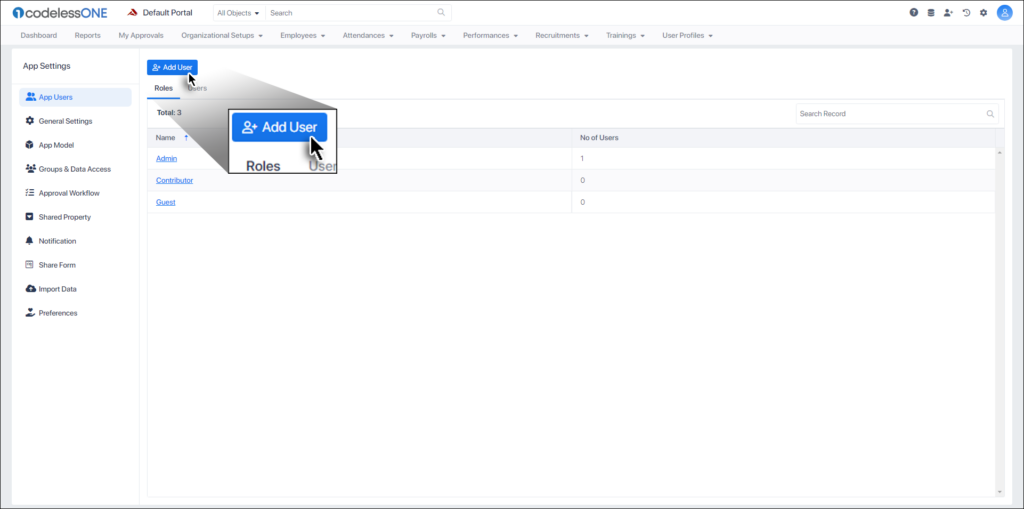
Navigate to App Users Tab
In ‘Application Settings’, the ‘App Users’ tab opens by default. This section lists the default roles (Admin, Contributor, Guest) assigned by the system for every application.
Note: You can modify these roles’ access rights or create new ones tailored to your team’s needs through the ‘App Model’ and ‘Roles’ tabs.
Add Users
Click on “+ Add User“.
This button opens a form where you can add individuals to the application.
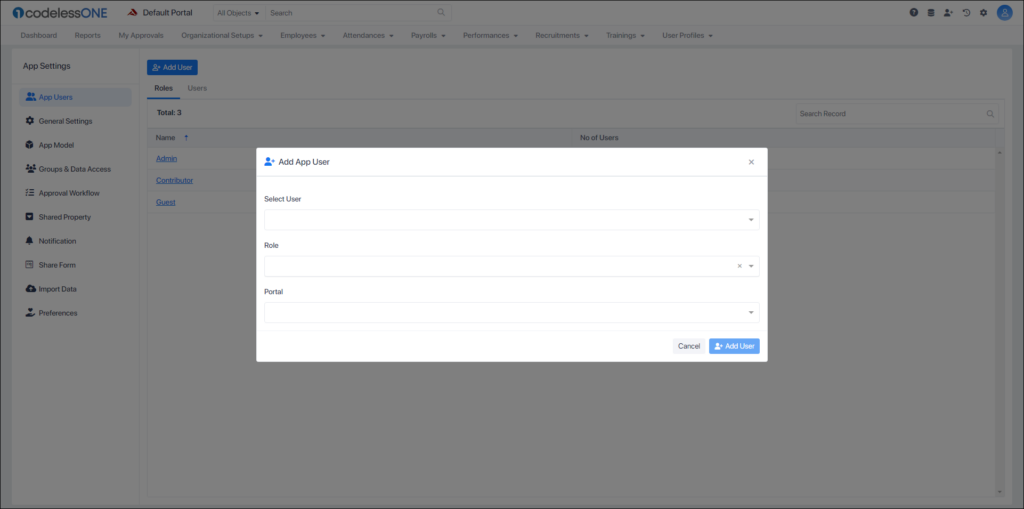
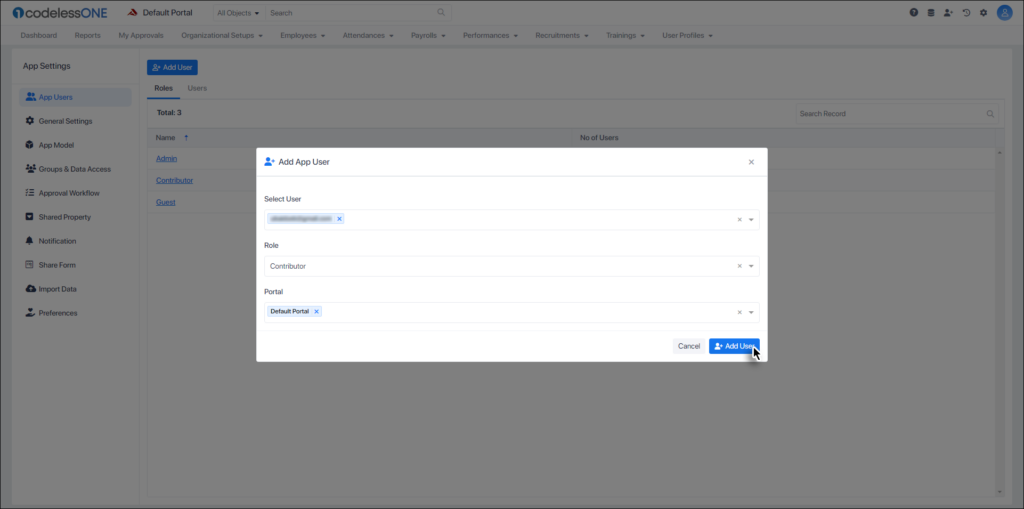
Fill the Form
Select Users: Choose from the list of workspace-invited users. Users need to accept your invite to appear in the list.
Select Role: Assign a role that defines their access and permissions within the application.
Select Portal: If available, assign users to specific portals designed for their team or department.
Once all fields are selected, click on the “Add User” button.
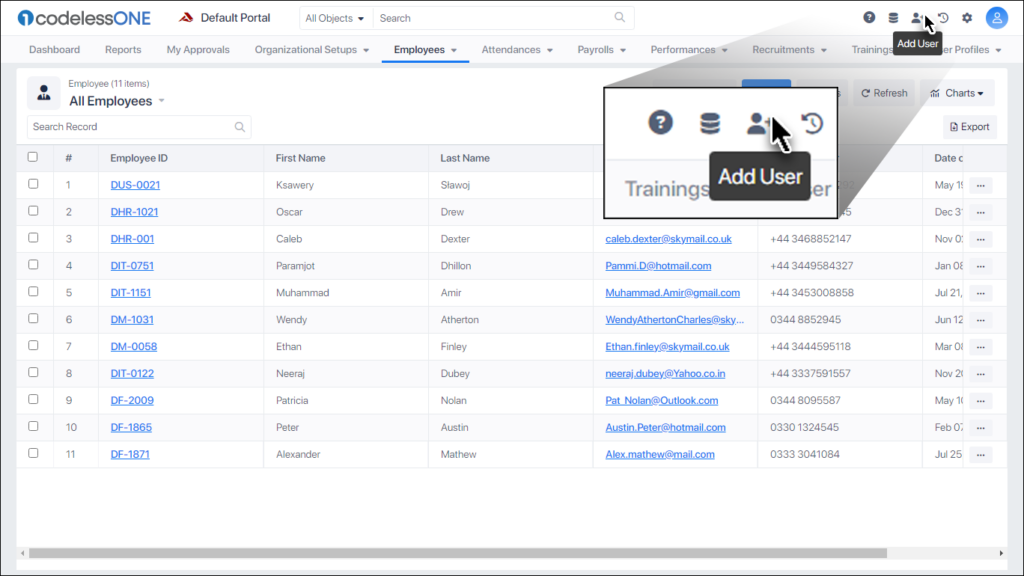
Method 2: Direct Addition
Use the Icon: Located at the top of your workspace, this option provides a shortcut to the user addition form, following the same process as in Method 1.
After Inviting Users
Email Notification: Immediately after being invited, users will receive an email containing a direct link to access the application they’ve been added to.
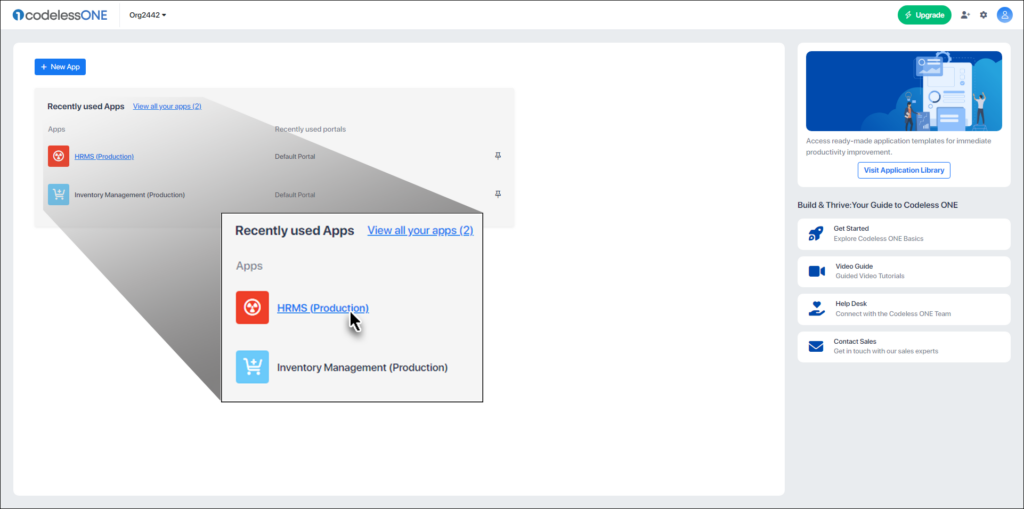
Accessing Applications: Users can also discover and access all applications they are part of by going to the “View all Apps” section located on the homepage of their workspace.
This area provides a consolidated view of all accessible applications, making it easy for users to navigate to the relevant workspaces efficiently.
Remember, assigning users to roles and portals restricts their access to those specific areas, enhancing both security and focus.
Monitoring User Access
After setting up user access, the ‘Roles’ tab allows you to view the distribution of users across different roles. Additionally, the ‘Users‘ tab provides detailed information about each user, ensuring you have full visibility and control over who accesses what within your applications.
This systematic approach to user management within Codeless ONE not only optimizes productivity but also fosters a more organized and collaborative working environment.
 Icon: Located at the top of your workspace, this option provides a shortcut to the user addition form, following the same process as in Method 1.