Skip to content

Mastering State Rules for Property Management in Your Application

Mastering State Rules for Property Management in Your Application

In applications that require tracking the progress or status of various items, such as customer leads or project tasks, managing how these statuses can change is vital.
State rules offer a structured approach to controlling these status changes or state transitions of a property within an object, ensuring that each change follows your application’s logic and workflow.
This article explains the concept of state rules, outlines the steps to set them up, and illustrates their functionality through an example.
State rules are configurations within your application that govern the transitions between different states of a property in an object.
For example, a “Lead Status” property might have states like New, Contacted, Working, Qualified, and Unqualified. State rules help ensure that transitions between these states adhere to defined business logic, such as only allowing certain user roles to mark a lead as Qualified.

How to Set Up State Rules

Choose the Object and Property

Start by selecting the object that has the property you want to apply state rules to.

Navigate to Property Settings

Find the property within the object and access its settings. Look for the “State Rules” section on the right-hand side.

Activate State Rules

Turn on the toggle button within the “State Rules” section to enable state rules for this property.

Define the Rules

Click on the “Edit State Rules” button that appears after enabling the toggle.
This action opens the “Create Transition Rules Form.”
Illustration: Setting Up ‘Lead Status’ State Rules:
As an example, let’s set up state rules for a “Lead Status” property, assuming there are roles like Sales Representative, Sales Manager, and Sales Director in the application.
In the “Create Transition Rules Form,” you will fill out fields for “From State,” “To State,” and “Roles.”
For “From State,” choose “New.”
For “To State,” select “Unqualified.”
Under “Roles,” pick “Sales Representative.”
This configuration means that only users with the Sales Representative role are authorized to change a lead’s status from “New” to “Unqualified.”
To include additional state rules, simply press the “+ Add Rule” button.
Note: Within the role selection dropdown menu, you’ll find a list of all roles that have been established in the application. Initially, the system provides three default roles to begin with: Admin, Contributor, and Guest. It’s possible to assign multiple roles the permission to change the state, allowing for flexible access control.

Implementing the Rules

Save the Rules: After setting up your state rules, click the “Save” button to apply them.
Update the Application: To ensure the state rules take effect, click the “Update App” button. You’ll be prompted to confirm this update, which is necessary for the rules to become active within your application.

Demonstrating State Value Functionality During Record Creation

To illustrate how state values operate when creating a record, let’s consider adding a new record for the Lead Object. Here’s a scenario involving a sales representative:
Receiving and Entering a Sales Lead: A sales representative is tasked with handling a new sales lead. Initially, they will mark the lead’s state as “New” upon entry into the system.
Updating the Lead’s State: After making contact with the lead and evaluating the interaction’s outcome, the sales representative will update the lead’s state to either “Unqualified” or “Working,” depending on the lead’s potential for conversion.
Restrictions on State Changes: When the lead reaches the “Working” stage, the sales representative’s ability to modify the state further is restricted. This is due to the predefined rules that grant only the sales manager the authority to move the lead from “Nurturing” to “Working.”
Additionally, both the sales manager and the sales director are authorized to advance the lead from “Nurturing” to “Qualified.”
This process demonstrates the practical application of state values in managing lead progression, emphasizing the role-based permissions that govern state transitions to ensure each lead is handled appropriately at every stage.
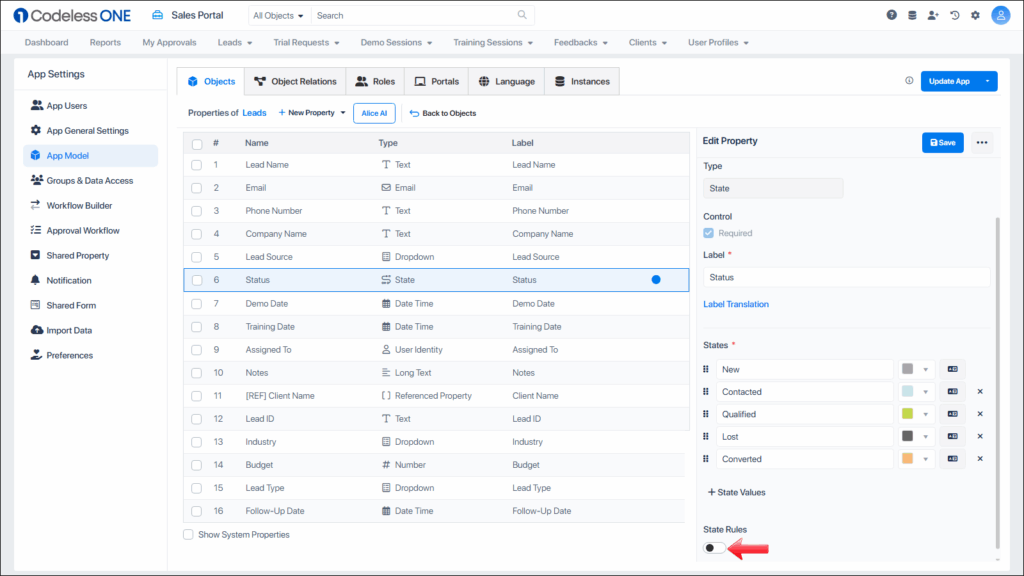
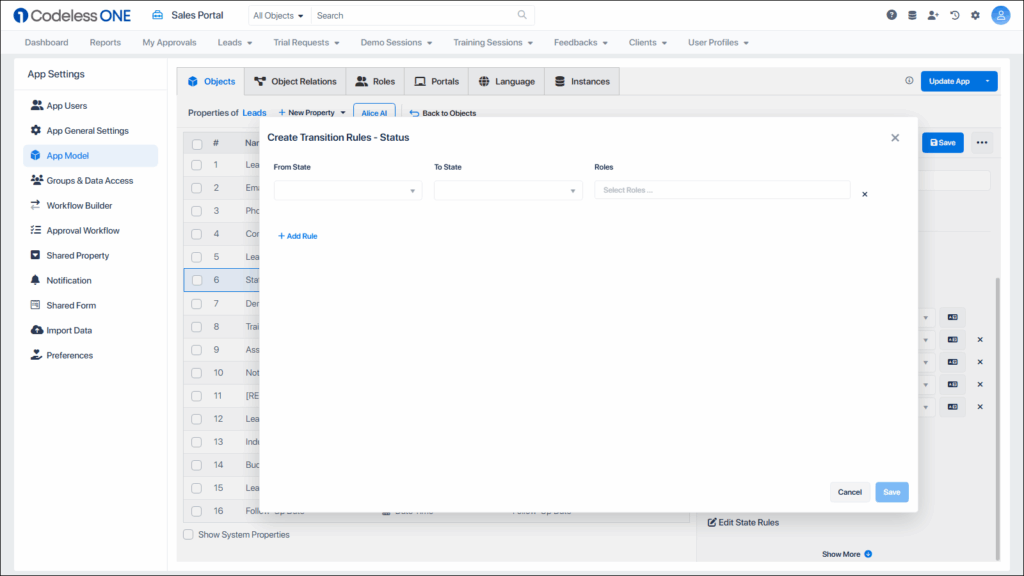
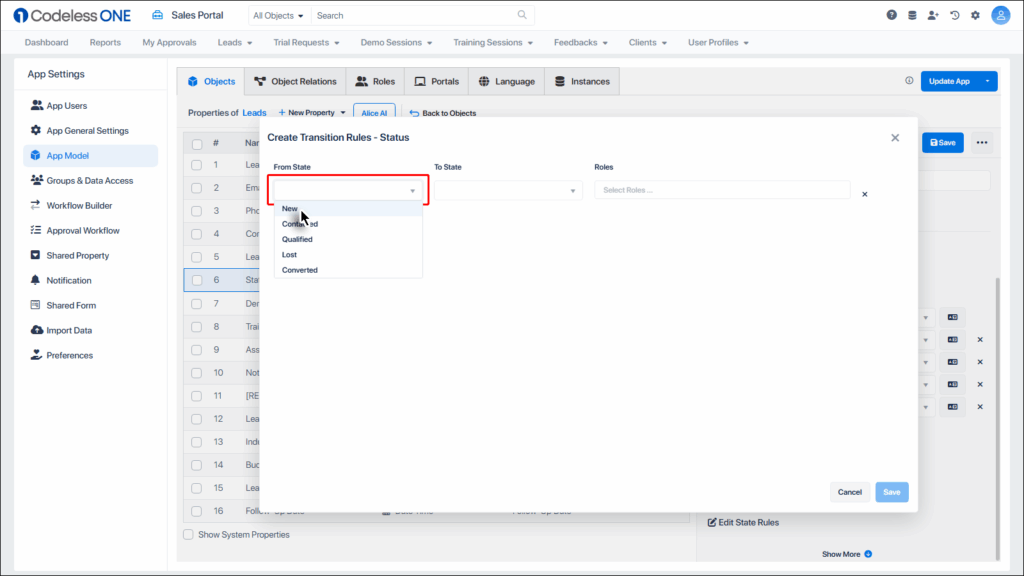
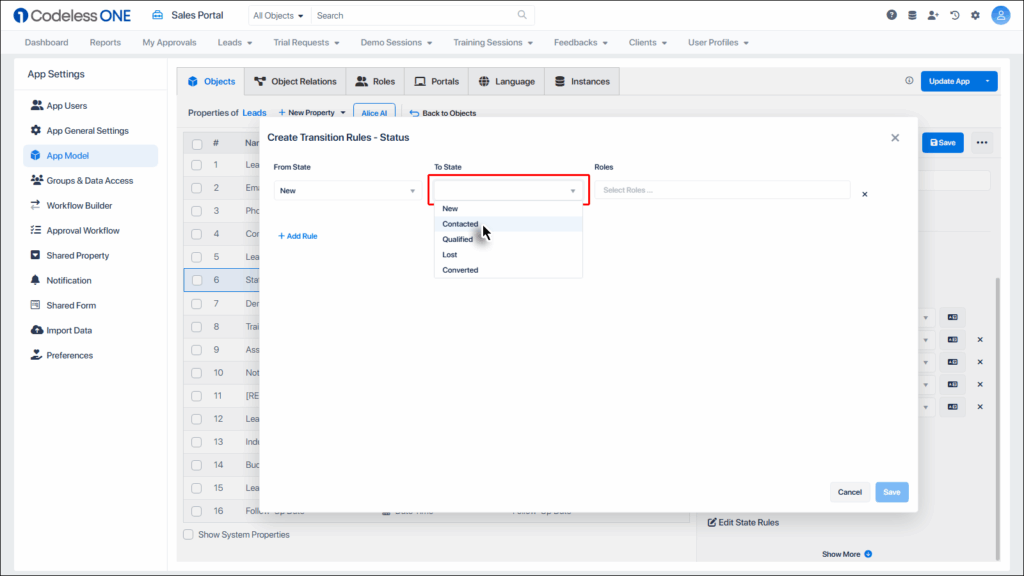
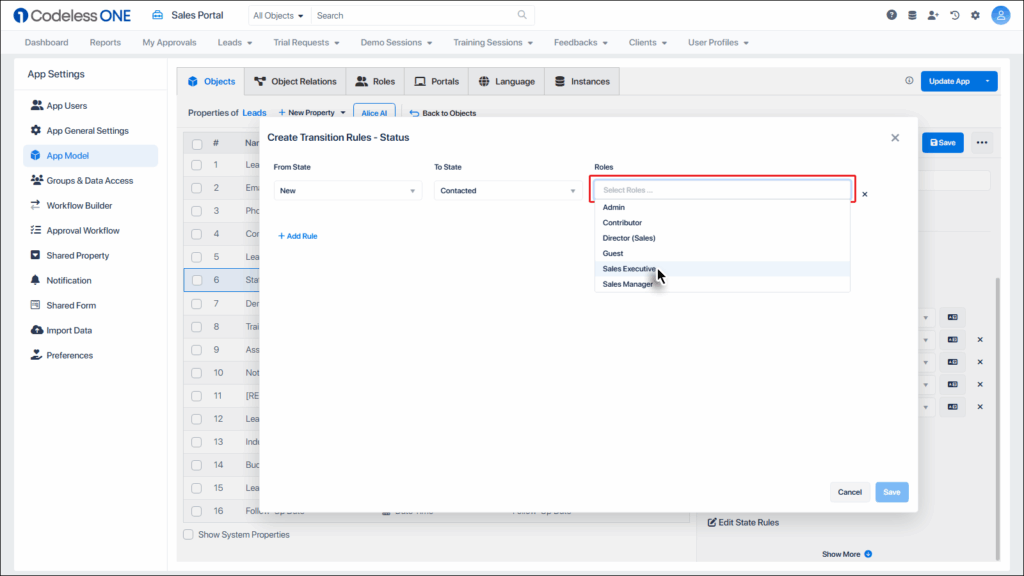
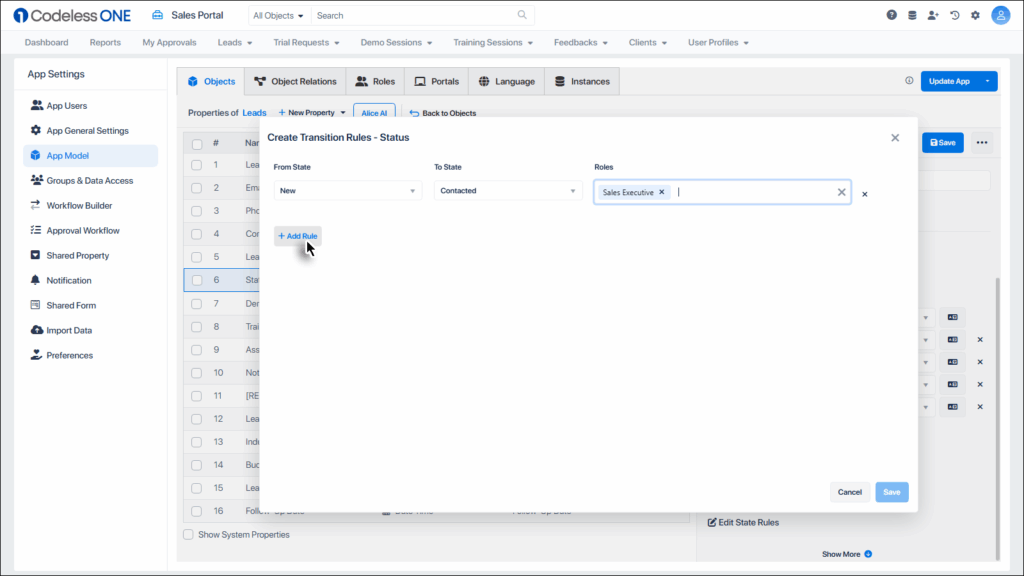
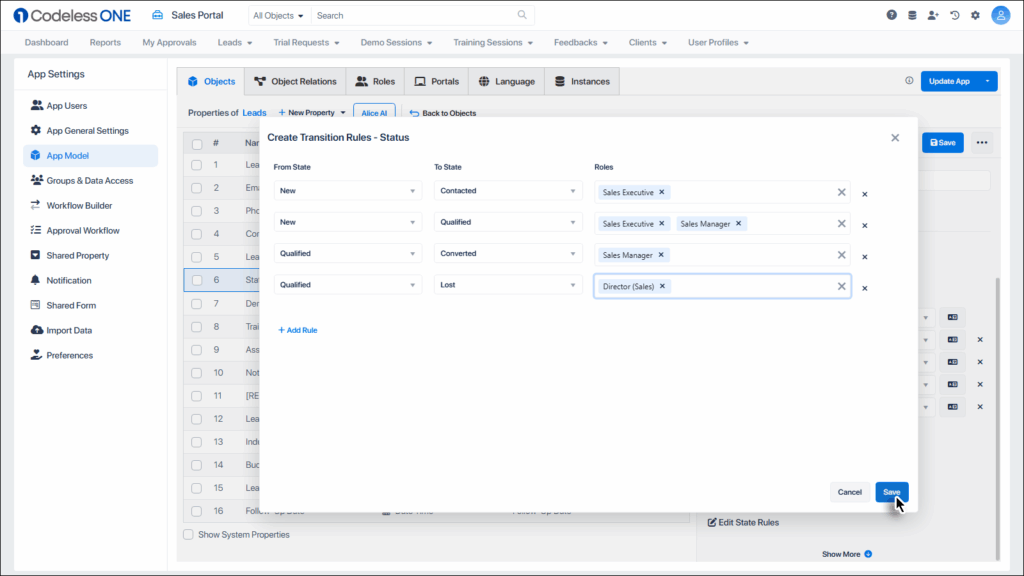
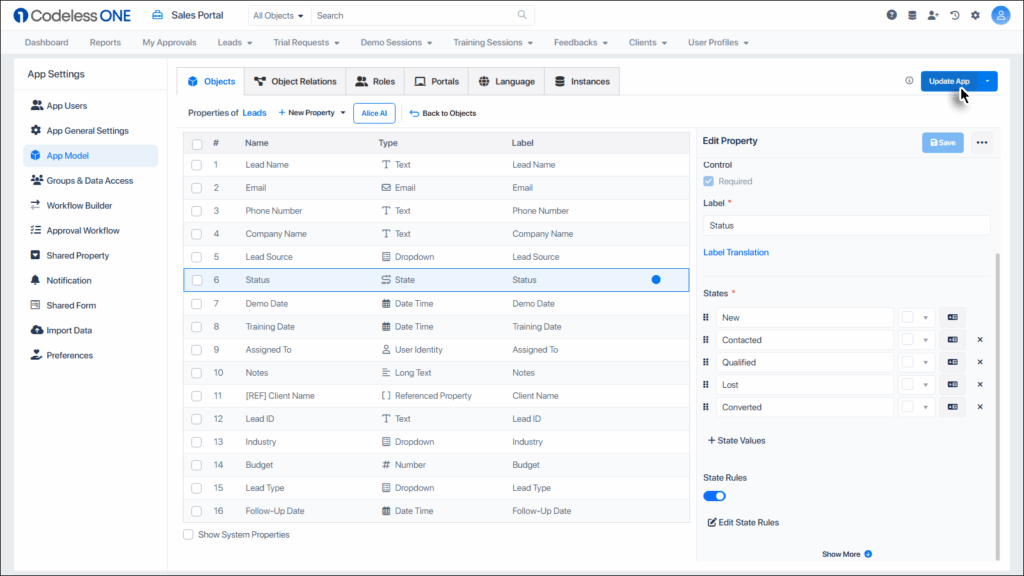
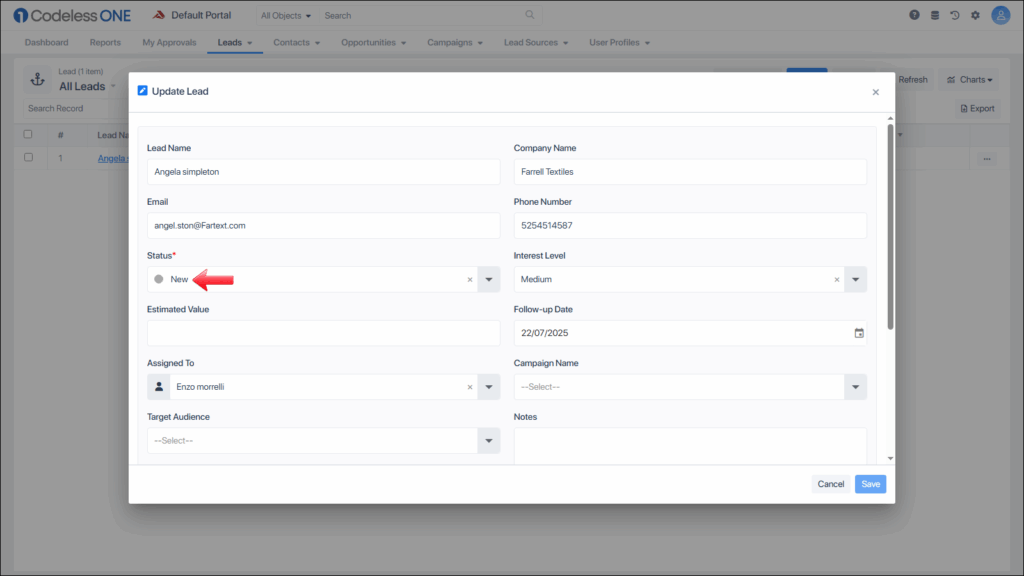
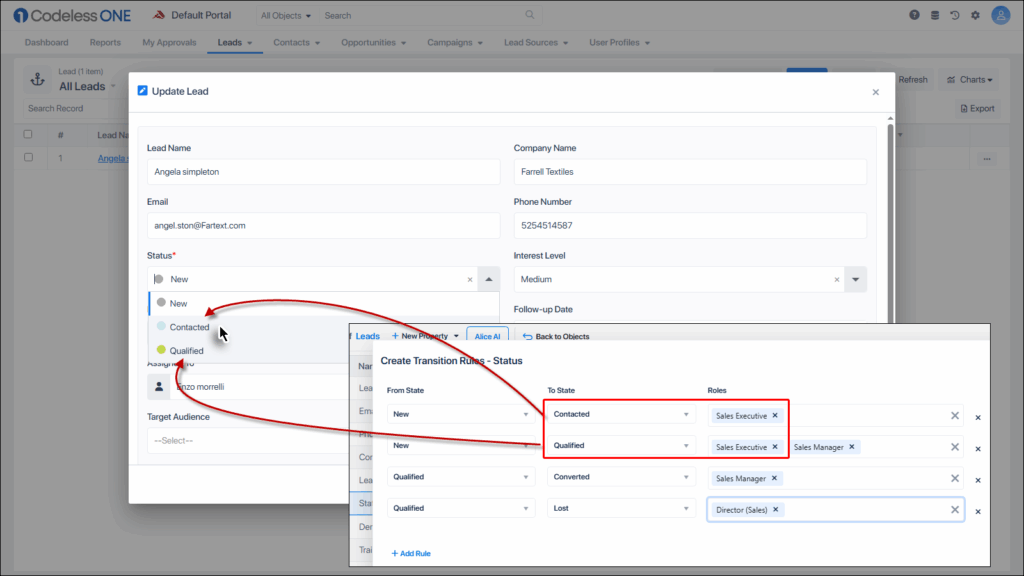
State rules are essential for maintaining the logical flow of status changes within your application. By clearly defining who can change the status of an item and under what conditions, state rules simplify workflow management, promote consistency, and ensure that your application’s data remains accurate and reliable.