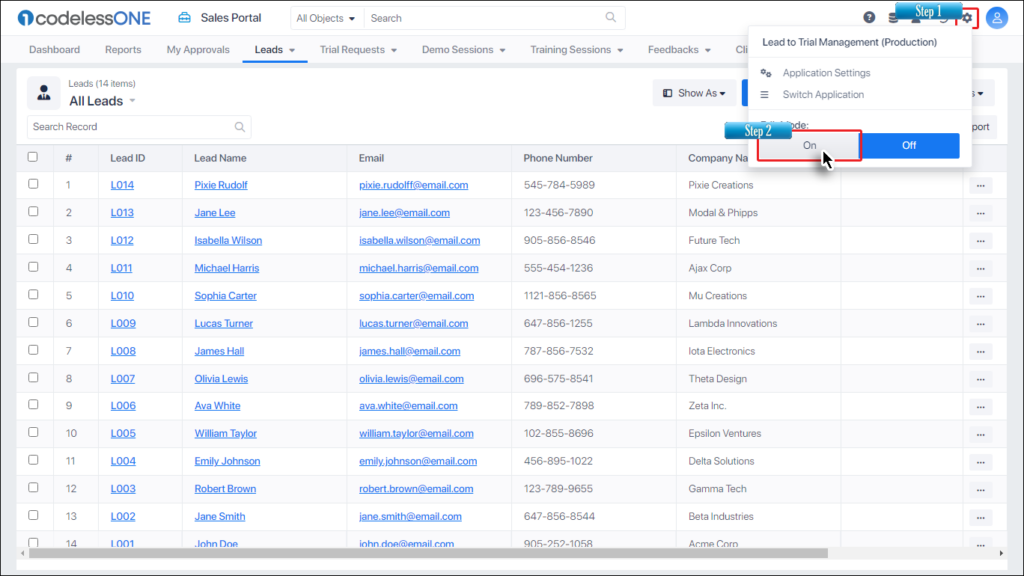
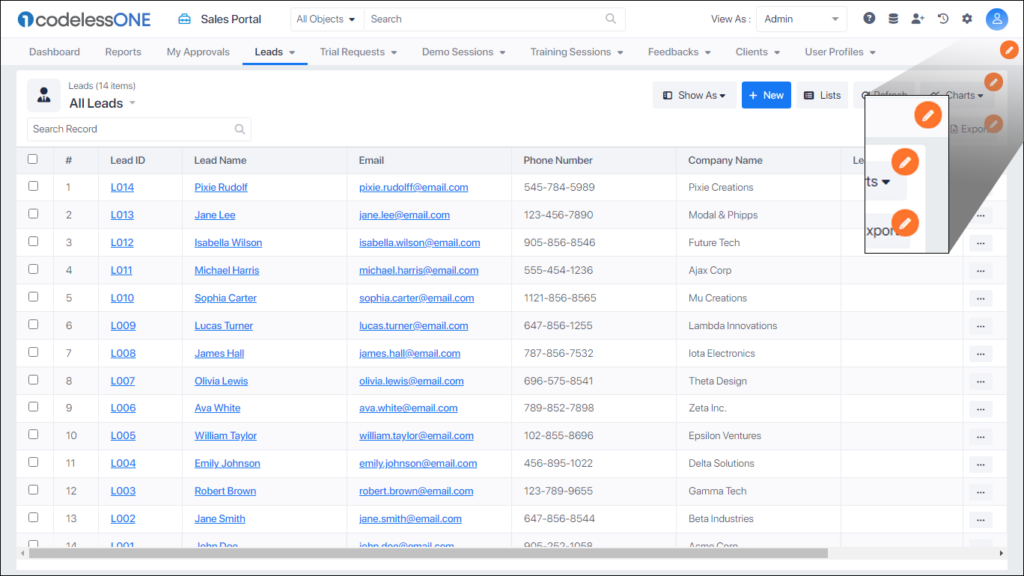
Skip to content
Home » Editing a table using Application Inline Edit

Editing a table using Application Inline Edit

Editing a table using Application Inline Edit

The Application Inline Edit feature offers users a powerful and flexible tool to directly modify and update the user interface (UI) of their application to suit their specific needs, without requiring extensive technical expertise. Much like an artist’s brush, this feature allows users to customize and fine-tune the way information is displayed and collected, giving them creative control over the appearance and functionality of their application.

A table can be updated in two ways:

  1. Selecting the columns to be shown/hide in the table
  2. Which actions can be performed on the table.

This article elaborates how a table can be updated both ways, using the Application Inline Edit feature. 

Show/hide a table's columns

Step 1: Select the desired table in the app

Open the relevant table that you want to edit.

Open desired table

The table is displayed. We can see that while all columns have values, the “Lead Source” column is empty and has no value for any of the records in the table. Let’s hide this column and show something else in it’s place.

Table displayed

Step 2: Turn on the Application Inline Edit feature

Click the App Settings Icon Settings Icon and then select the On button at the bottom left.

Enable Application Inline Edit

A message is displayed that the feature is enabled. Click the OKAY button, OR, wait for 5 seconds for the message box to disappear automatically.

Enable message displayed

The feature is enabled and the edit icons appear at the appropriate places on the page.

Application Inline Edit enabled

Step 3: Click the table edit icon

Click the bottom orange icon to edit the table.

click the edit table icon

Step 4: Click the Properties option

Click the Properties option, on the dialogue box.

Click Properties option

Step 5: Click the Select Properties button

Click the Select Properties button.

Click Select Properties button

A list of all the fields in the table is displayed. The enabled fields mean that these are currently being shown in the app.

Step 6: Select desired/uncheck unwanted fields

Uncheck the unwanted column from the list. In our case we don’t want Lead Source to be displayed in the table, so we are going to uncheck it. Similarly, select the field(s) that you want to include in the table.

Select/unselect the checkboxes

Step 7: Click the Select button

When all the unwanted fields have been unchecked and all the desired fields have been included (relevant checkbox selected), then click the Select button.

Click Select button

Step 8: Update the page

Click the Update Page button.

Update page

The page is updated and the table now shows the Status and Industry columns instead of the Lead Source columns.

Table updated

Step 9: Turn off Application Inline Edit feature

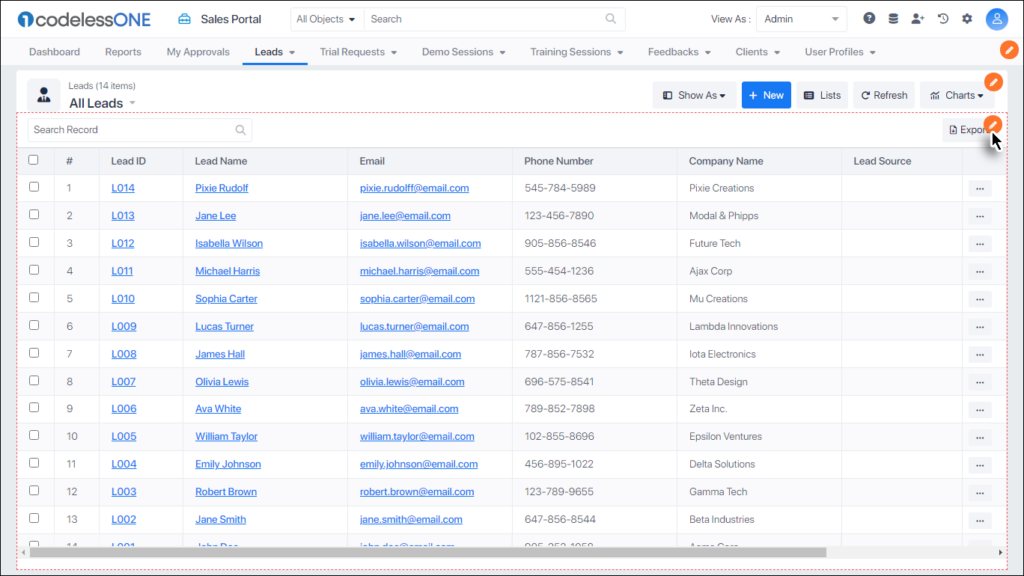
Once again, click the the App Settings Icon Settings Icon and then select the Off button at the bottom right.
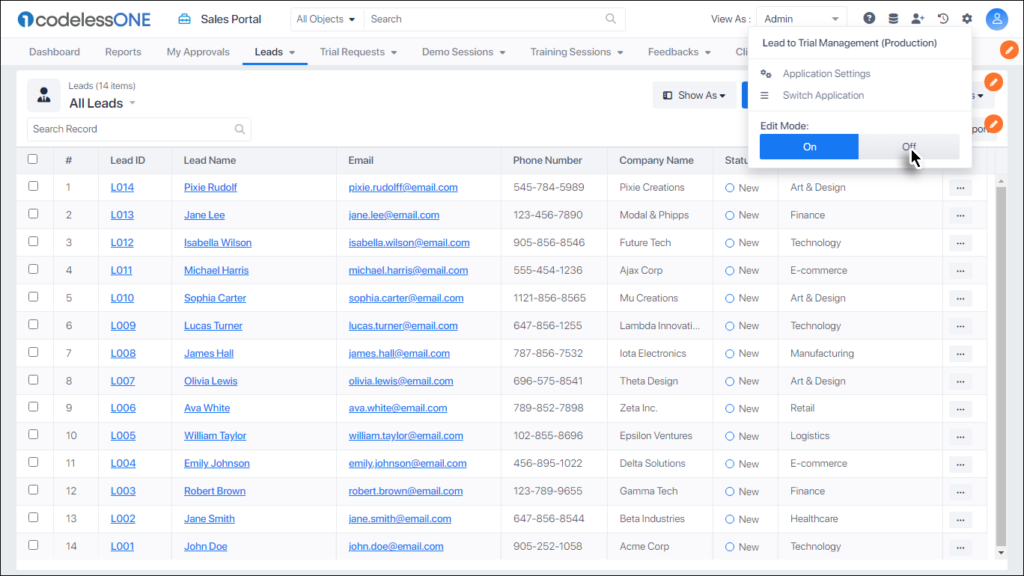
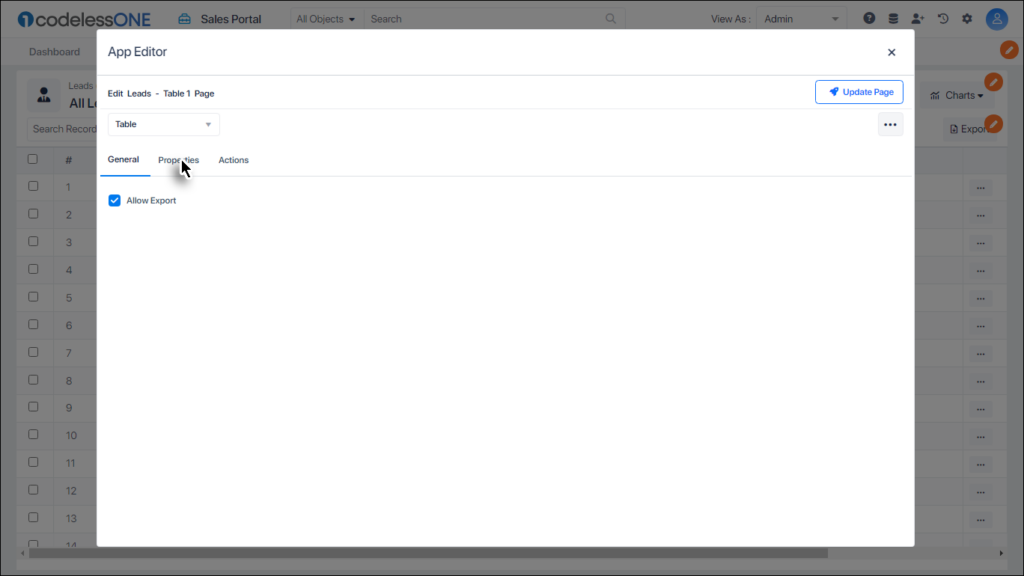
Turn off Inline Edit

The orange-colored edit icons disappear and the page returns to its original form (but with updated columns).

updated table

Edit table actions

What is a table action?

Click on any Ellipsis button in the table.

Click ellipsis

The menu that appears, contains the actions available for this table. We can customize which of these actions could appear in the menu, using the following steps.

table actions

Step 1: Turn on the Application Inline Edit feature

Click the App Settings Icon Settings Icon and then select the On button at the bottom left.

Enable Application Inline Edit

The feature is enabled and the edit icons appear at the appropriate places on the page.

Application Inline Edit enabled

Step 2: Click the table edit icon

Click the bottom orange icon.

click the edit table icon

Step 3: Click the Actions option

Click the Actions option from the dialogue box.

Click actions option

The contents of the Action menu are displayed, showing that currently two options are being displayed in the menu.

current action meu contents

Step 4: Customize the menu items

Let’s un-check the Delete option so that users can’t delete records in the table.

customize actions menu

Step 5: Update page when done

Click the Update Page button, after you are finished customizing the action menu.

Click Update Page button

If you click the Ellipsis button now, only the Edit option will be shown in the Actions menu.

Action menu updated

The Delete option can be reinstated in the menu, whenever desired, using the same method, described above.